


How to Configure 3CX PBX using DID Logic SIP Trunk
How to Configure 3CX
This Guide presupposes that you already have purchased or ported in DID into your DID Logic Account, and have an active DID ready for use, and have some familiarity with using the DID Logic portal.
For a full guide to using the DID Logic Portal, (Guide to Buying DID, Creating SIP Account, Setting a destination on a DID, and Using the Portal) please click on the following link: https://didlogic.com/setup/provisioning-help/portal-tour
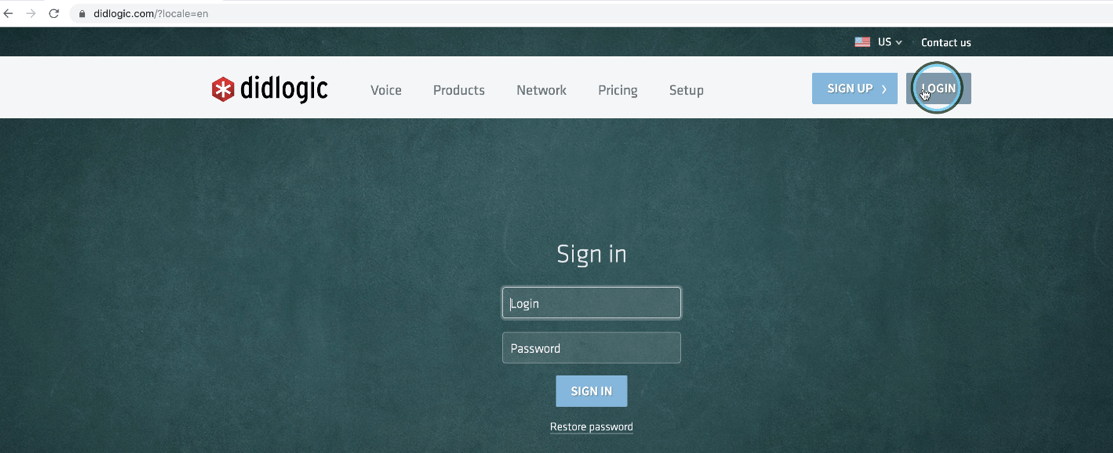
Begin by logging into the DID Logic Portal.
Manage DIDs and SIP trunks
Through our online portal, you can instantly add or change DID numbers, set destinations for your DID, set your SIP Account credentials, apply custom dial plans, and implement security limitations.
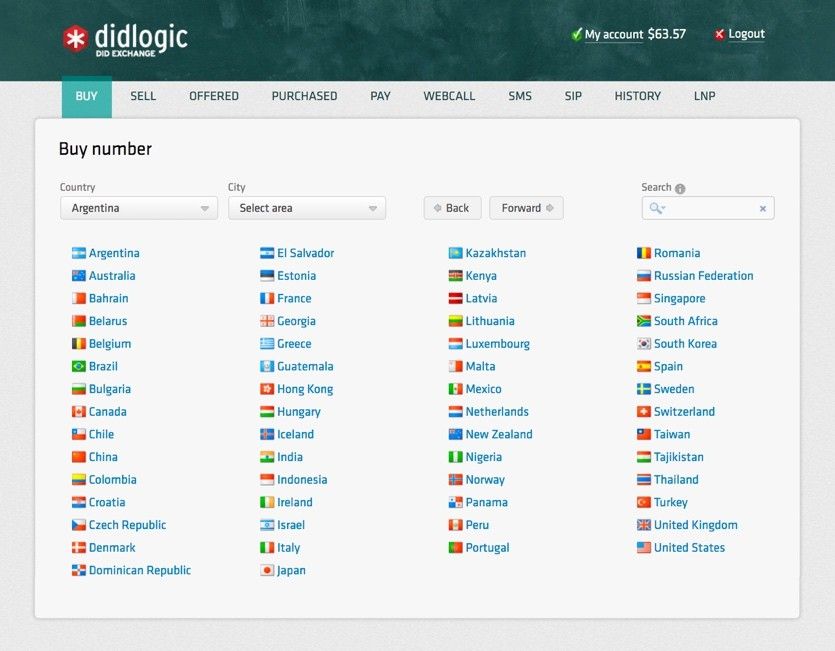
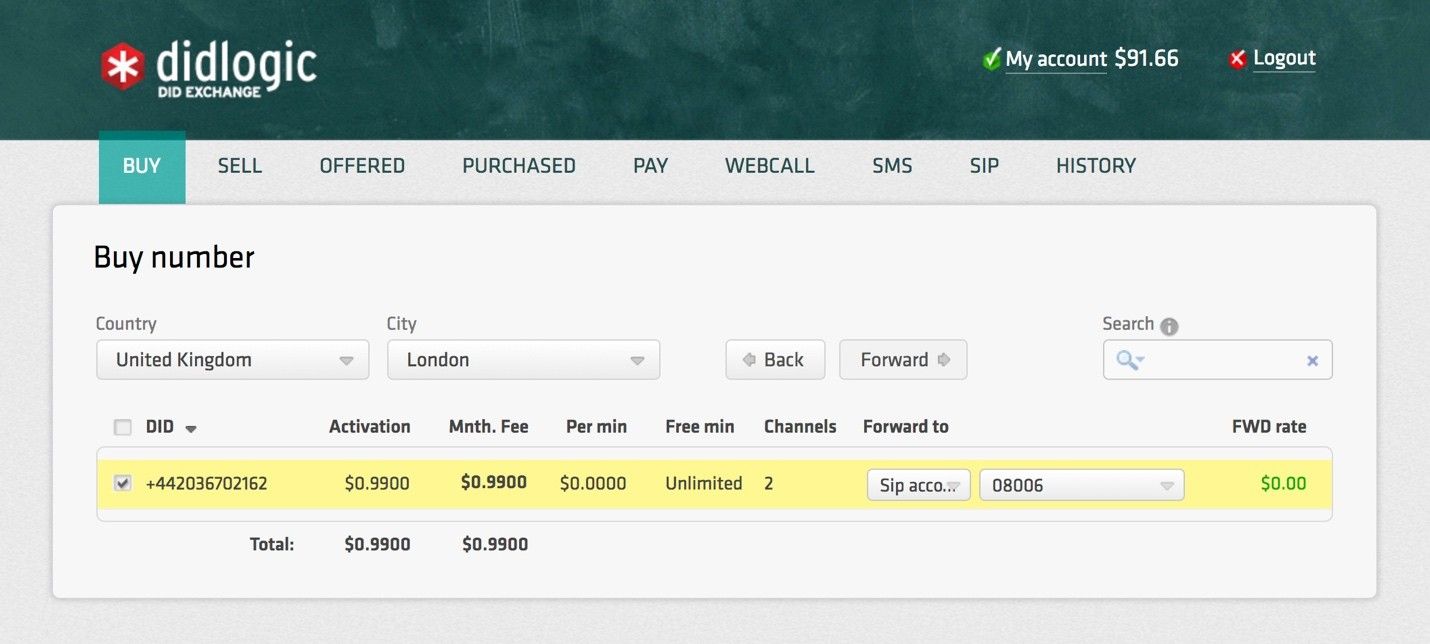
Select and Purchase your new DID via the tab Labelled “Buy”
Point your new DID to SIP Account, SIP URI, or to a Phone number (See our New Number setup Guide for more details. https://didlogic.com/setup/provisioning-help/new-number-setup )
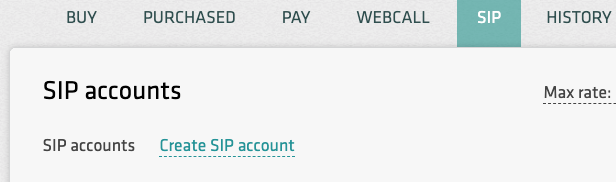
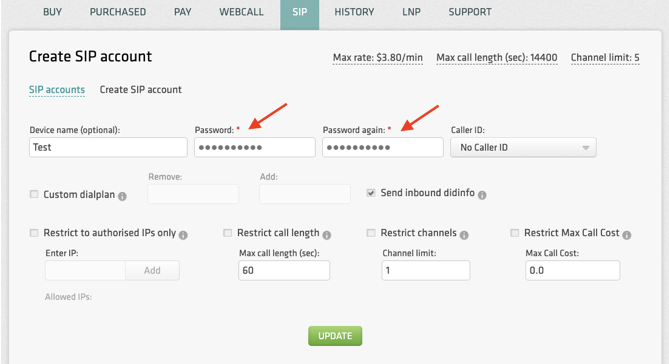
On the tab labeled “SIP” click on the “Create SIP account” link in order to set up your SIP credentials and set security limitations.
Set the Device Name (optional) and put in a Strong Password. And click Update to create the new SIP account.
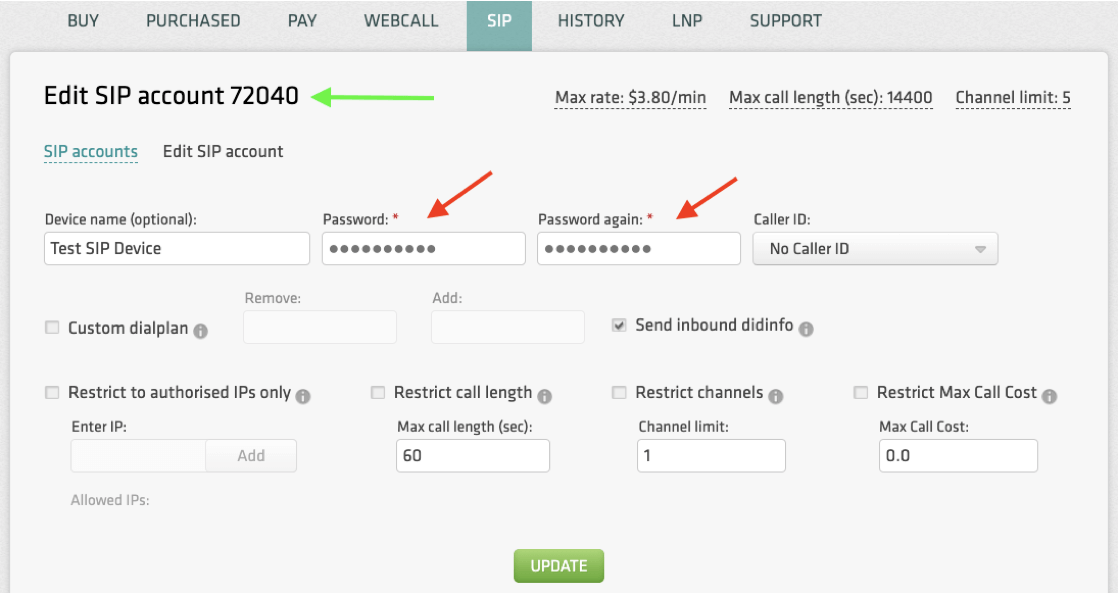
Once the 5-digit SIP account number is generated (see green arrow) it will be your Username that you will use to authenticate with DID Logic. The password will be the password you set for yourself (see red arrow). (Note: You can also set a Caller ID to map to the SIP Account by clicking on the dropdown list. Only DIDs purchased through DID Logic will be listed on the dropdown list. If you prefer to manage Caller IDs via your PBX, please be sure to inform either your account manager or email [email protected] to have this feature enabled on your account.)
Now that your SIP account has been created. We can start to configure the 3CX system.
At this point you should have the following:
- SIP Account Username and Password,
- DID purchase via DID Logic Portal.
3CX Server connected to the internet ready to be configured. (See the following link for documentation on how to install 3CX software onto a server. https://www.3cx.com/3cxacademy/videos/basic/installing/ )
Configuring 3CX Server
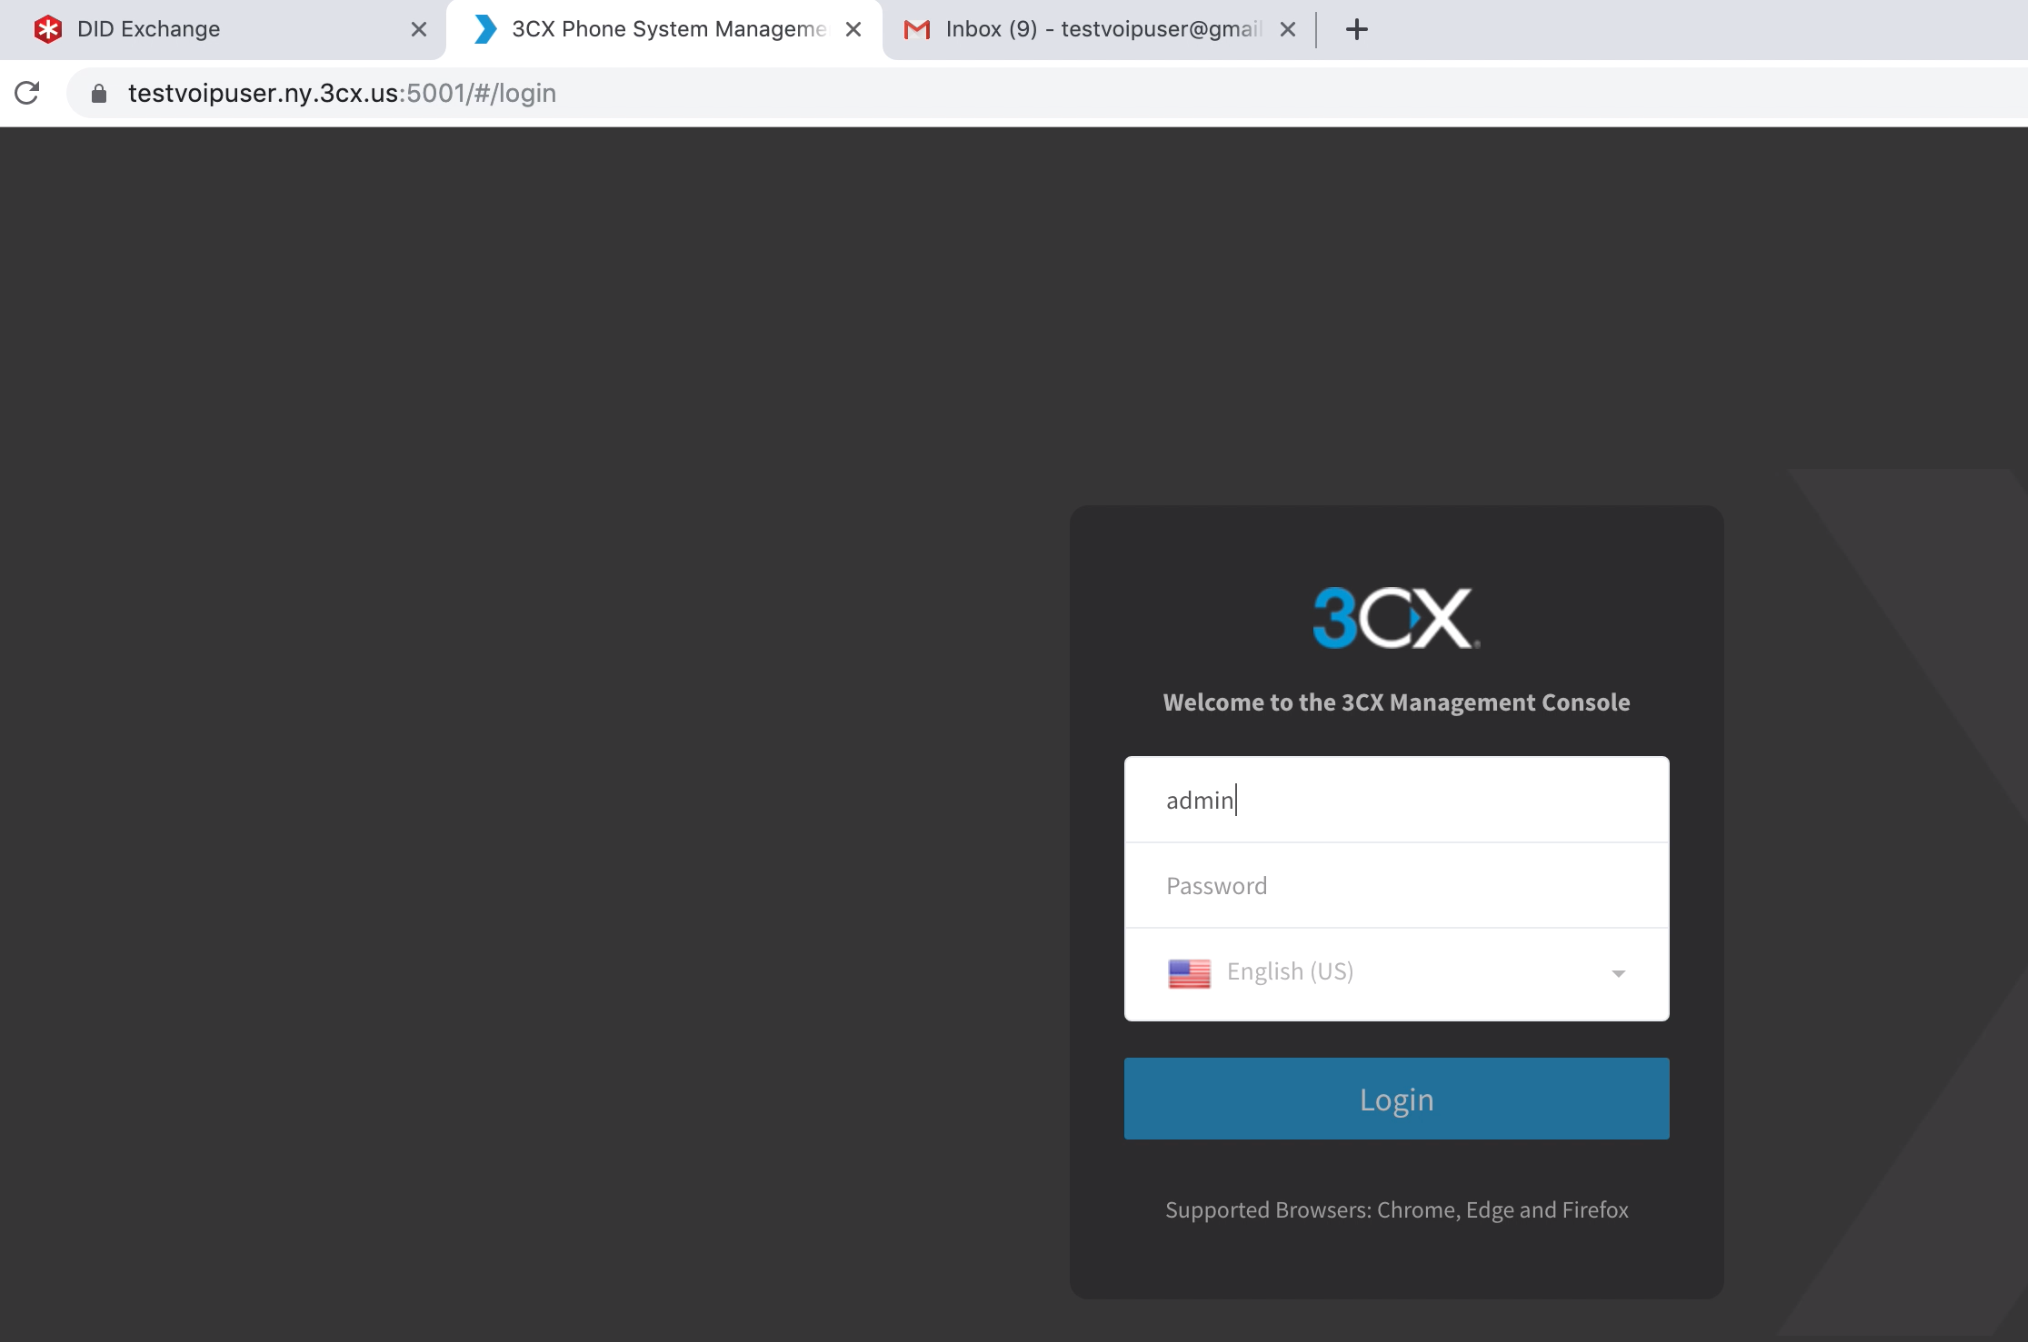
Start by logging into the 3CX Management Console.
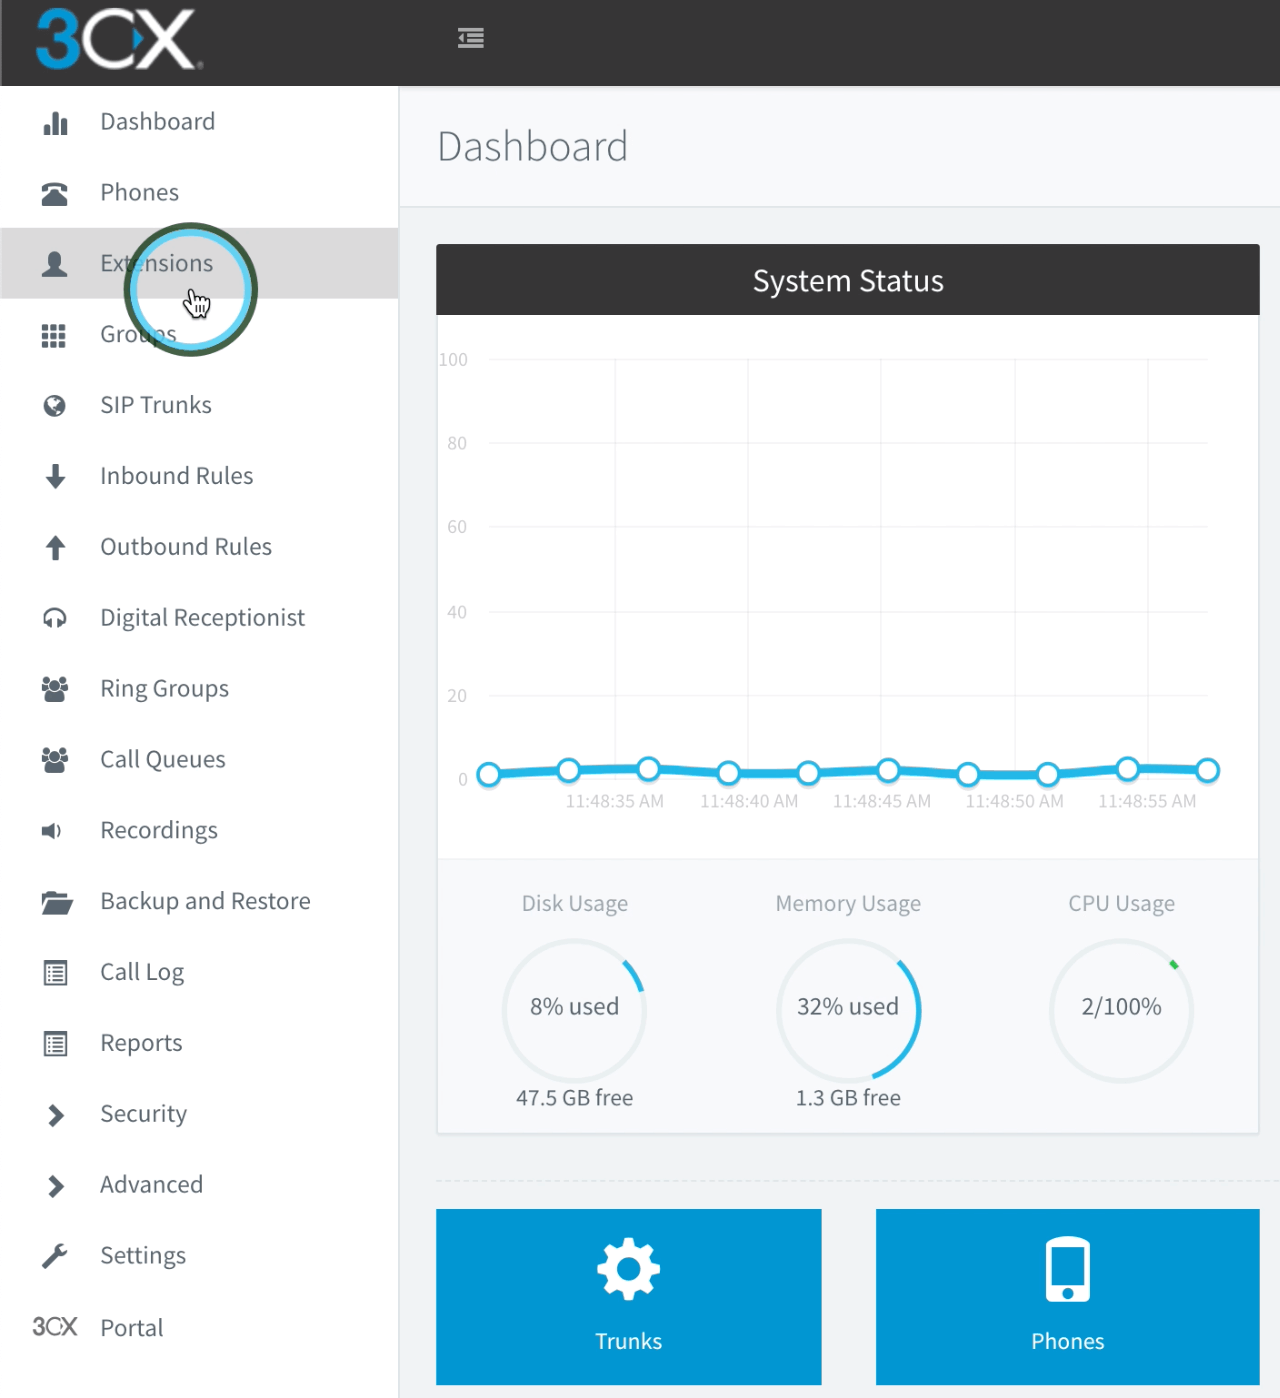
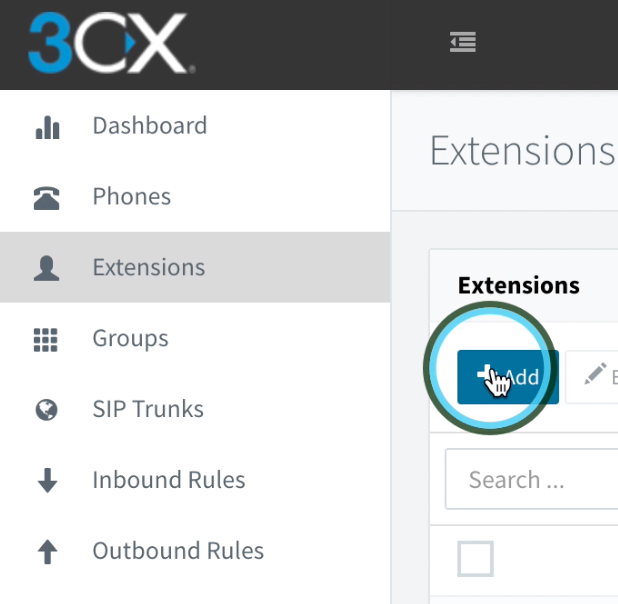
From the 3CX Management Console Dashboard, go to the left-hand column and click on the section called “Extensions” and then click the “Add” button.
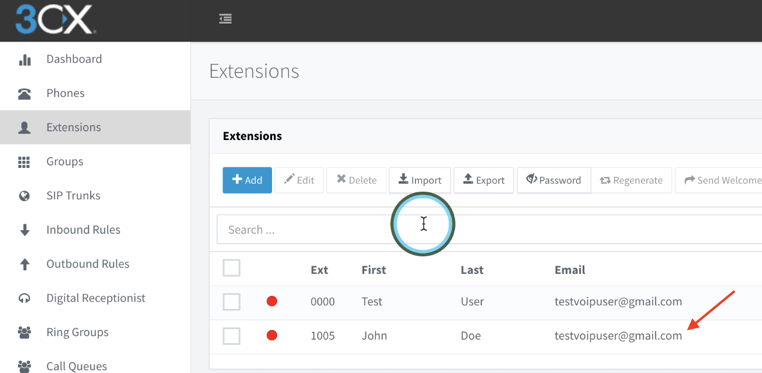
From the Extensions Properties page, go ahead and fill out the fields as seen in the screenshot below but with the user information of your choosing (be sure to use an active email account that you can receive email on as the PBX will send an email with a configuration file we’ll use later to test our setup). Then click OK.
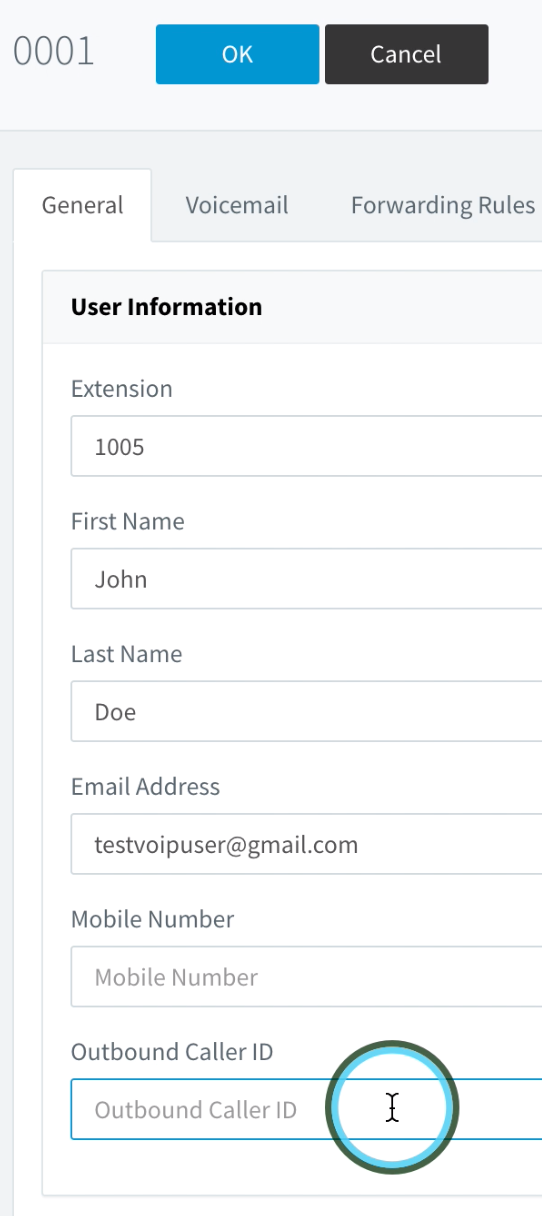
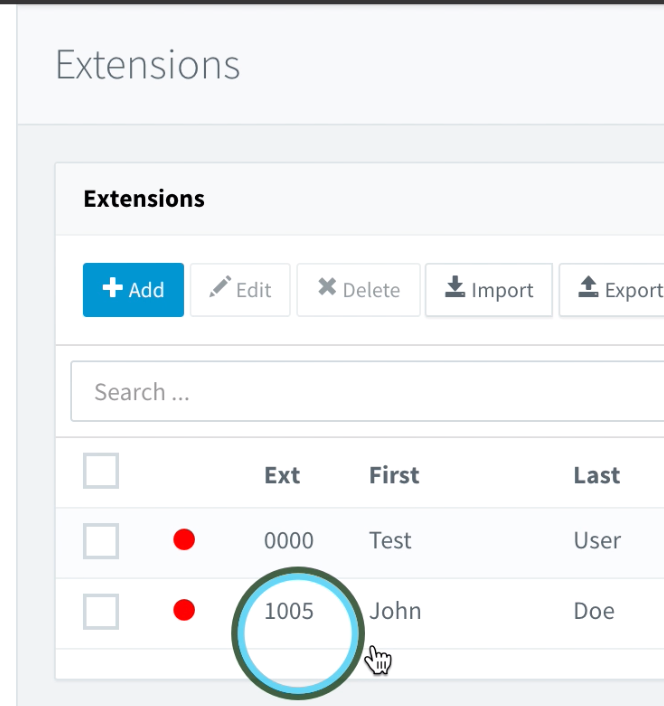
(*In the Outbound Caller ID field, you can fill in the number you wish to be used as the Caller ID by default on this extension. Mobile Number is optional). Once the Extension is created you will see it listed in the Extensions section of the Console.
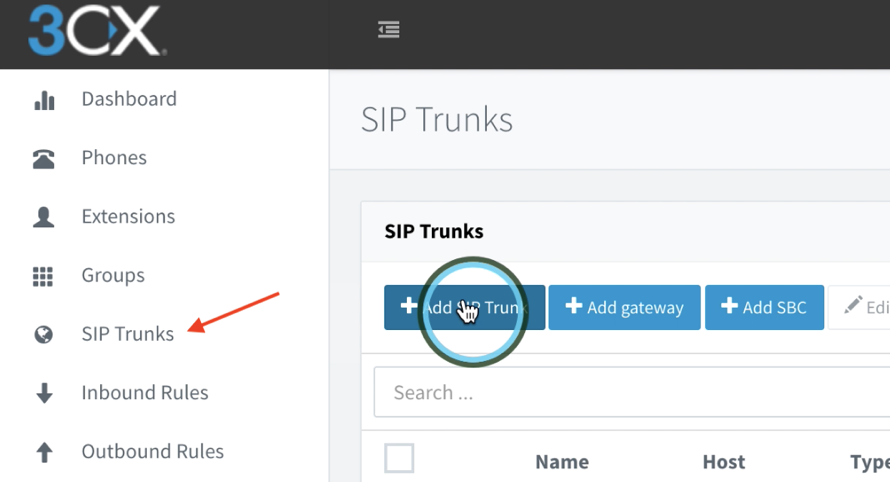
The next step would be to set up a SIP Trunk. Start by going to the left-hand side column and clicking on “SIP Trunks”. This will take you to the SIP Trunks section, where you can click on the blue button labeled “Add SIP Trunk”
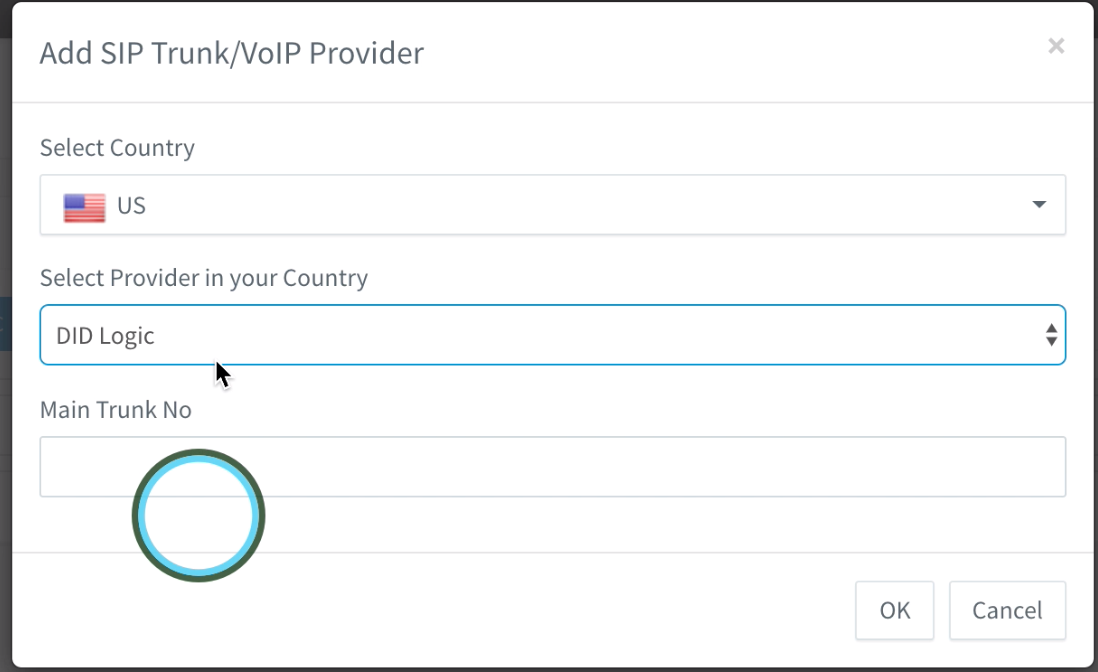
This will bring up a Prompt, where you can select Country, and DID Logic as the Provider. (Main Trunk No is the field where you can put in a default Caller ID for calls made through this SIP Trunk.) Then click “OK”
This will bring up the SIP Trunk Properties for the DID Logic Trunk on 3CX.

You will first want to update the field labeled “Registrar/Server/Gateway Hostname or IP” by selecting a Regional DID Logic Proxy and entering the hostname of the regional Proxy. Using a regional proxy will reduce latency and ensure the best call quality. Pick a gateway that is located near you or that has the least amount of latency from the list below.
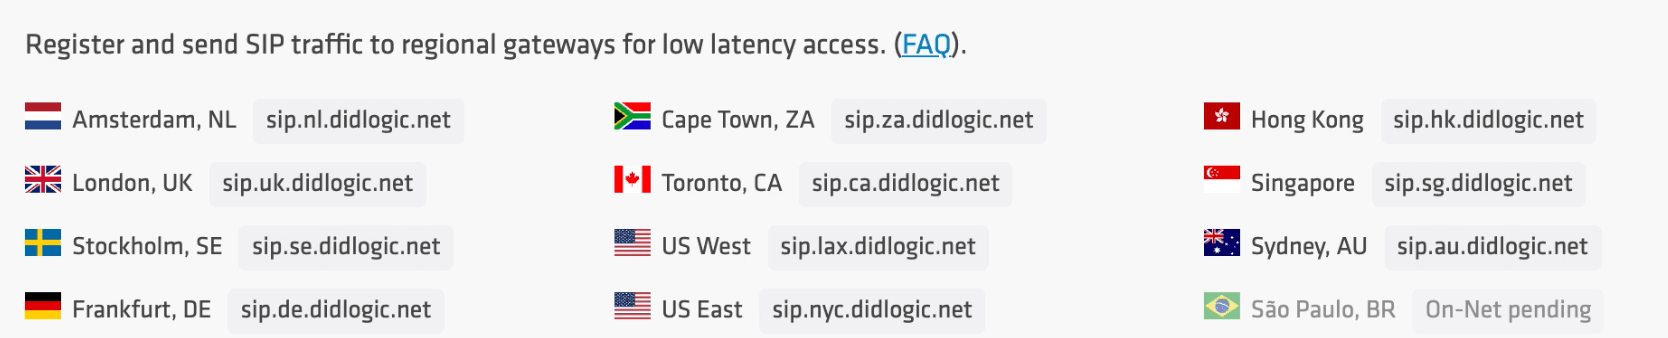
For this guide, we will be using sip.nyc.didlogic.net. So we will update the Gateway Hostname with the Regional Proxy hostname. Also, we will update the “Number of SIM Calls” to 2.
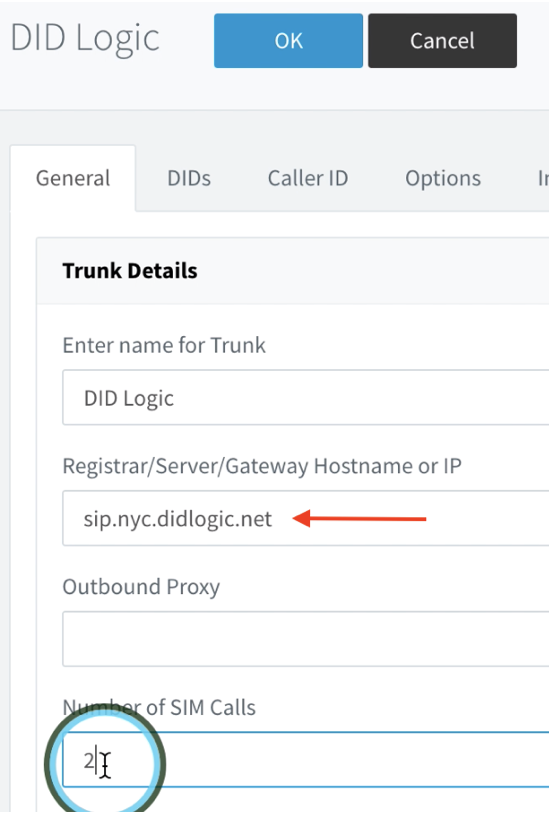
(Note: By default, when creating a new account at DID Logic, the maximum number of simultaneous calls on the account is set to 2 as a security precaution. Please reach out to either [email protected] or your account manager if you would like this adjusted.)
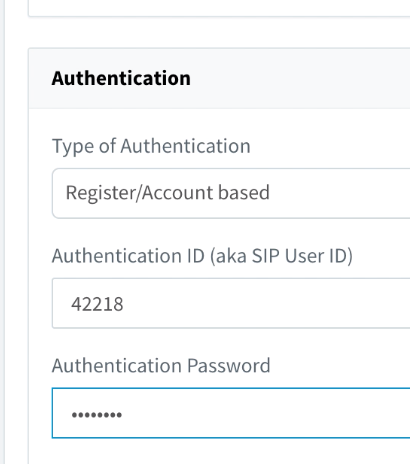
Next is to scroll down to the section labeled “Authentication”. Here you would fill out the field with the credentials you created at the beginning of this guide on the SIP Accounts section of the DID Logic Portal.
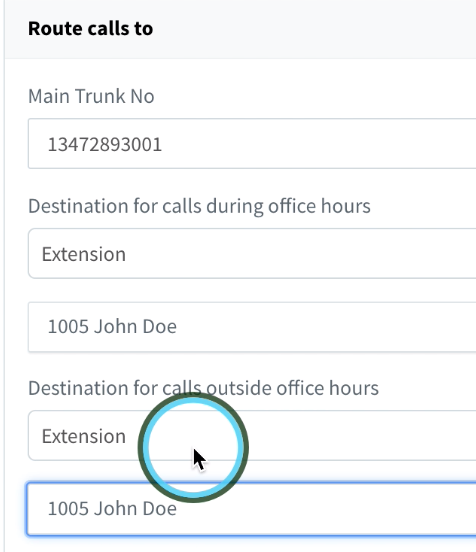
In the next section, “Route calls to”, you can configure how the default inbound calls are routed. For this guide, we are routing them to the test extension that we created earlier.
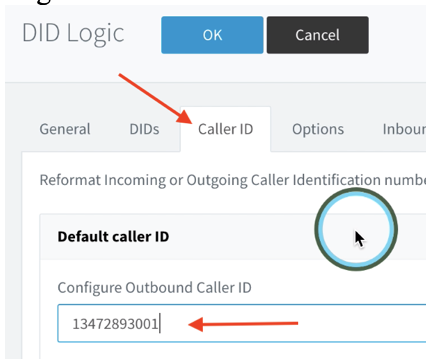
Next, we can set the “Default Caller ID” by clicking on the tab labeled “Caller ID” and fill out the first field labeled “Configure Outbound Caller ID” with the DID you purchased from DID Logic
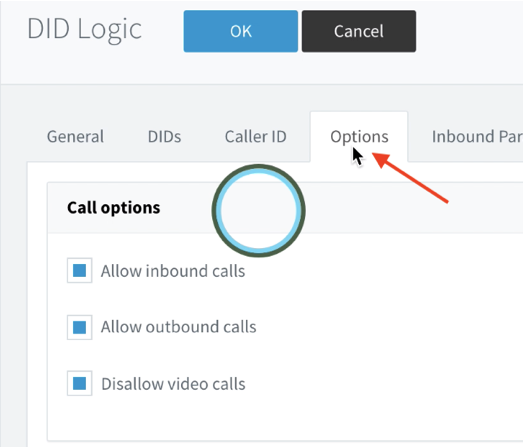
After that, you will want to confirm the following settings are enabled/checked under the Options Tab:
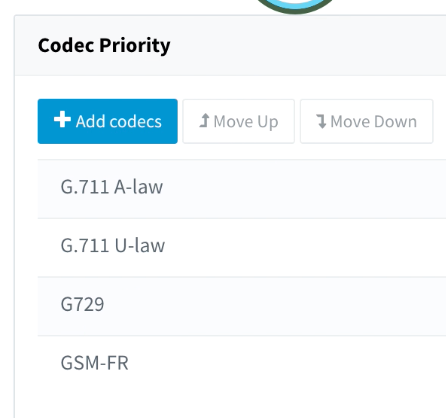
Also in the Options tab towards the bottom of the page are the Codec Priority Settings. DID Logic Supports the codecs listed below but recommends the G.711 for most use cases.
Once that is complete, you can click on the “OK” on the top of the page to save the SIP Trunk Settings.
It usually takes a moment or so for 3CX to fully register the SIP Trunk, so we will move on to the next step while this is happening and circle back to the SIP Trunk Settings later.
Next, we will configure the Inbound Rules in 3CX, which will control how 3CX will process inbound calls. Note: The steps below are just a basic configuration we are using to make a simple inbound test call. For information regarding the more advanced features of 3CX (including Inbound and Outbound rules configuration), please see the links below:
https://www.3cx.com/3cxacademy/videos/basic/
https://www.3cx.com/3cxacademy/videos/intermediate/
https://www.3cx.com/3cxacademy/videos/advanced/
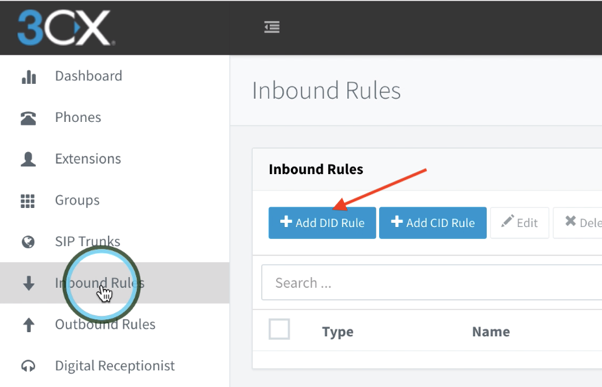
To start, navigate to the Inbound Rules sections and click on the blue “Add DID Rule” button
Once you are on the Add Inbound Rule page, you can enter in the DID you have purchased from the DID Logic Portal and set the destination for, and decide how the call should be processed within 3CX. In our case we will be routing all calls to our test DID over to the Test Extension (Extension 1005). (See screenshot below)
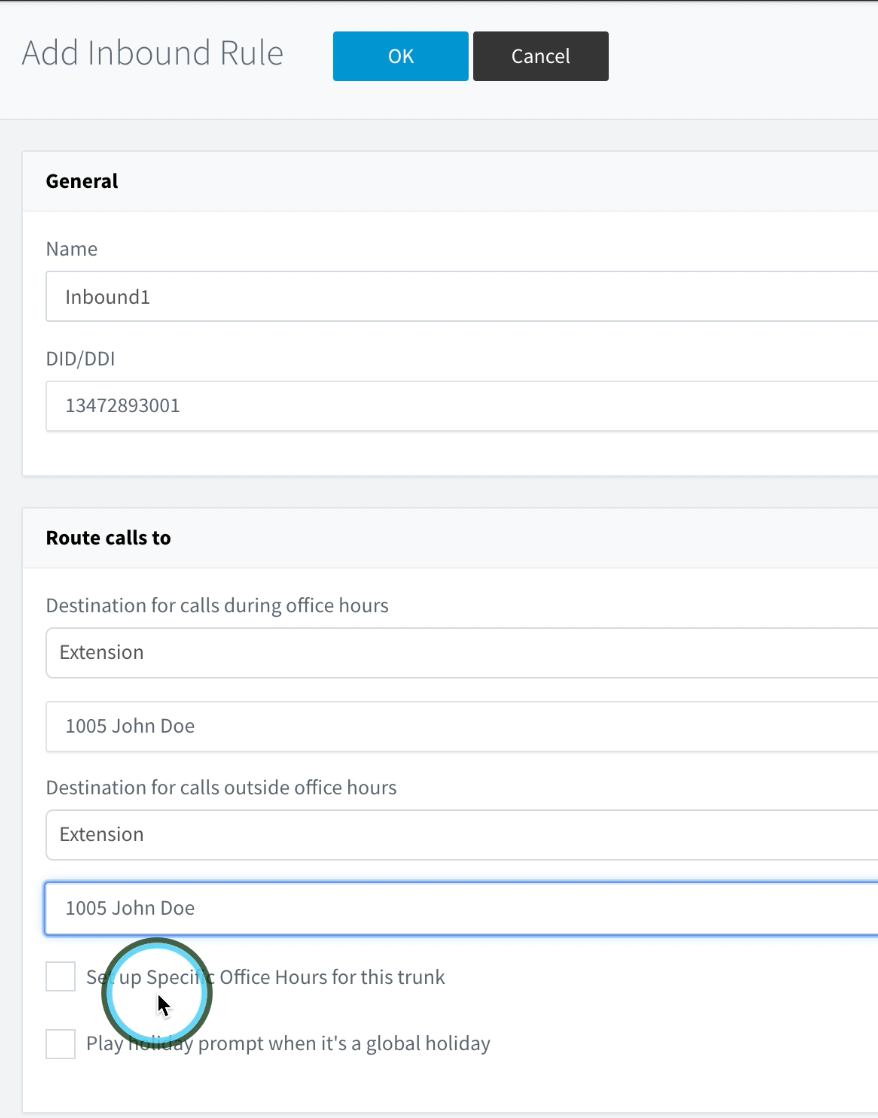
Then click “OK” to apply the settings.
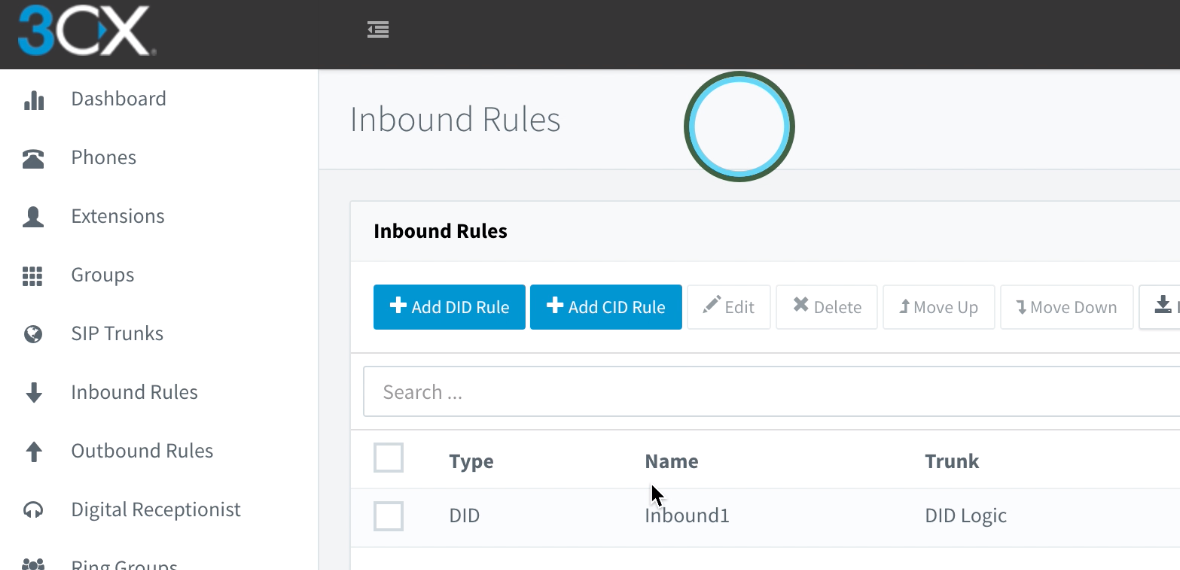
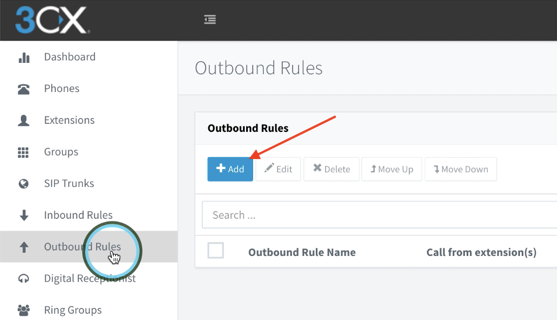
Similarly, we will want to configure the Outbound Rules so that outbound calls can also be tested. Navigate to the Outbound Rules section, and click on the blue “Add” button.
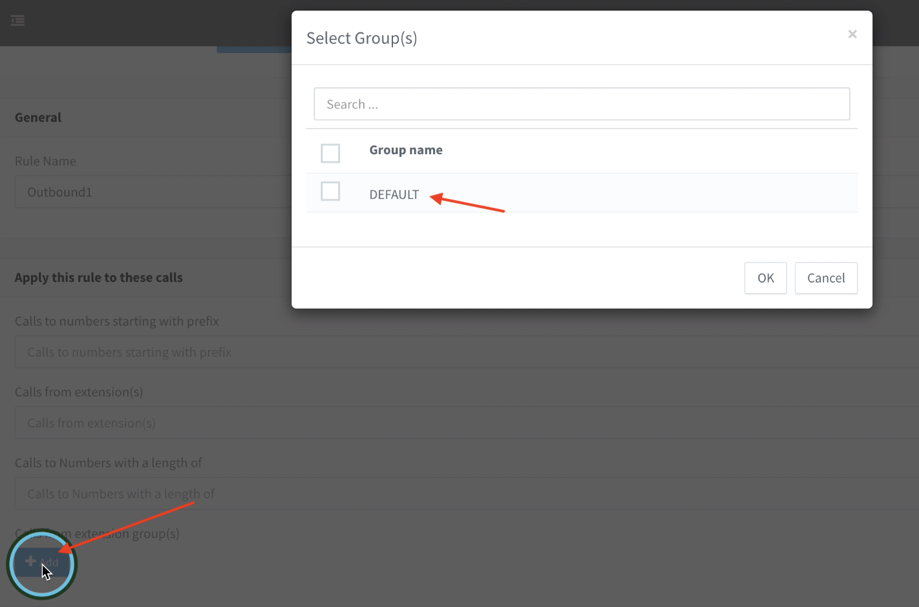
Within the “Add Outbound Rule” section, after we have named this rule “Outbound1”, we applied the rule to the Default extension group, but clicking on the “Add” button in the “Apply this rule to these calls” section, and checking off the “DEFAULT” group name. This should make the rule apply to all the extensions we have created so far, as they are automatically assigned to the DEFAULT group.
Finally, we want to send outbound calls out via the DID Logic SIP Trunk. You can select the SIP Trunk by clicking on the dropdown list in the “Make outbound calls on” section.

For our testing purposes, we are not stripping any digits or prepending as digits, but for your organization, you should make any necessary adjustments that allow digits to go out through to DID Logic in E.164 format.
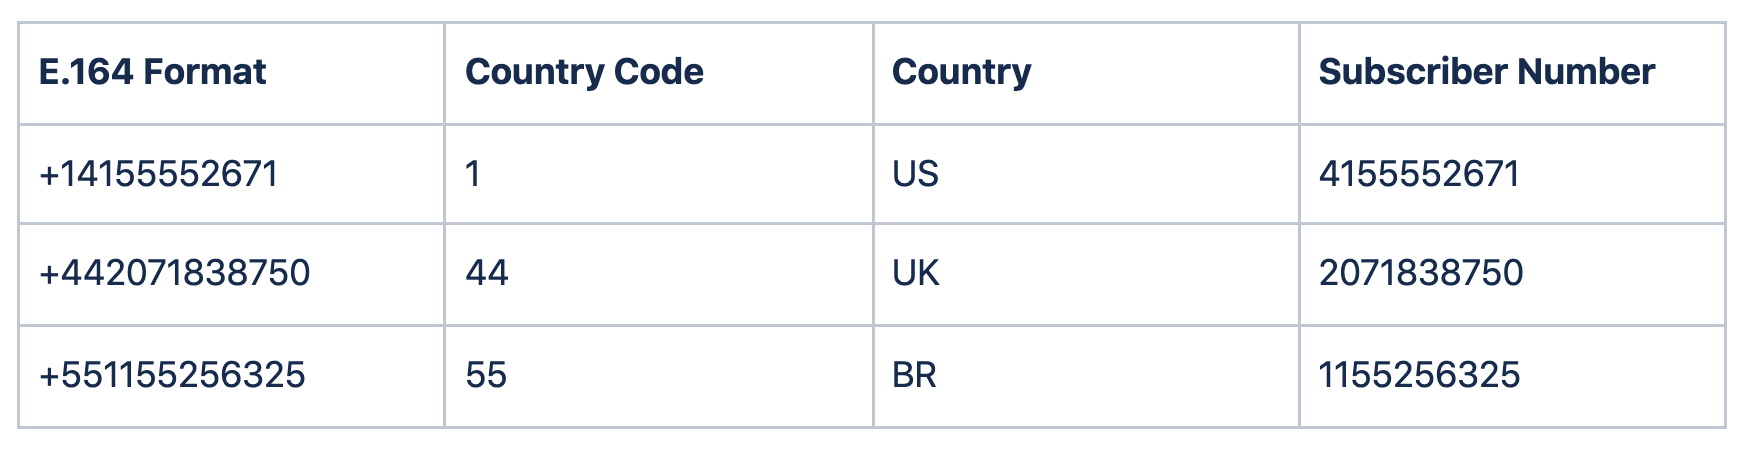
E.164 is the international telephone numbering plan that ensures each device on the PSTN has a globally unique number. This is what allows phone calls and text messages can be correctly routed to individual phones in different countries. E.164 numbers are formatted [+] [country code] [subscriber number including area code] and can have a maximum of fifteen digits.
Example of E.164 Numbers
Then you would click “OK” to apply the new Outbound Rule.
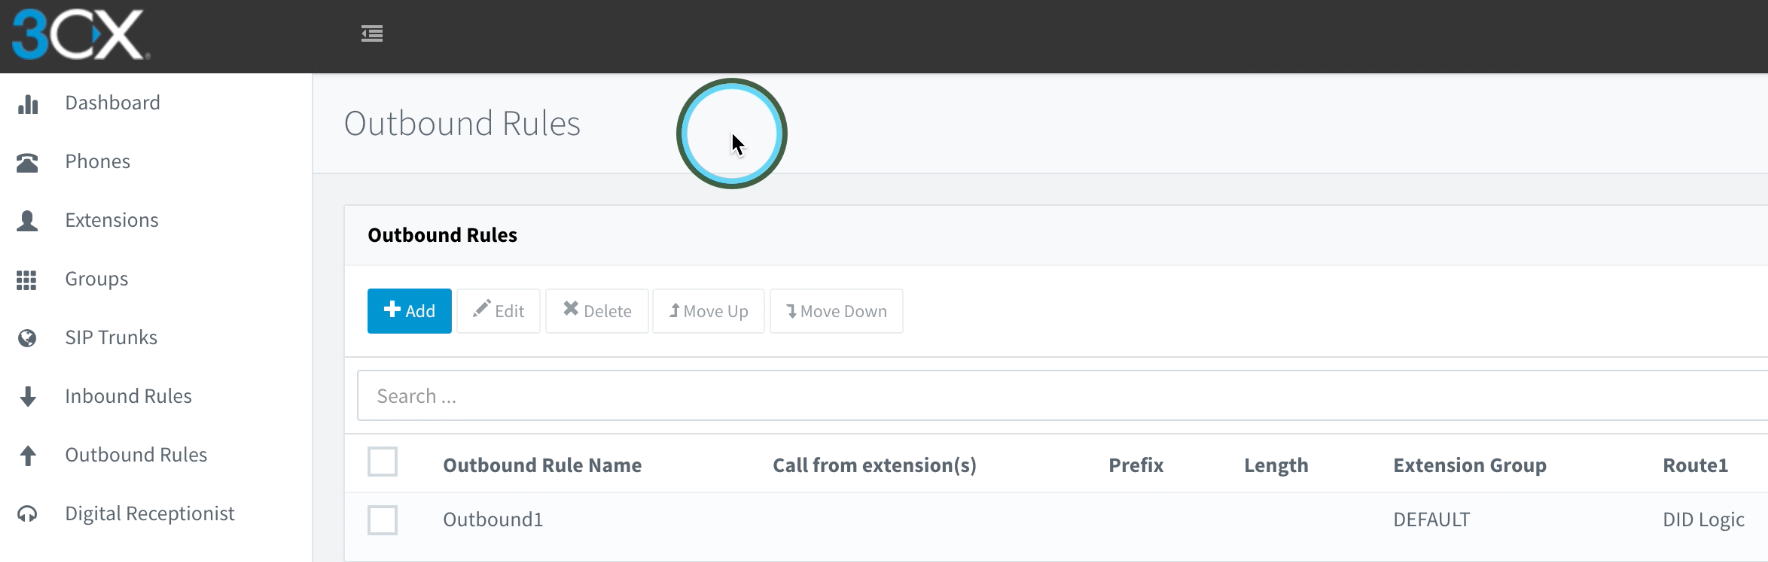
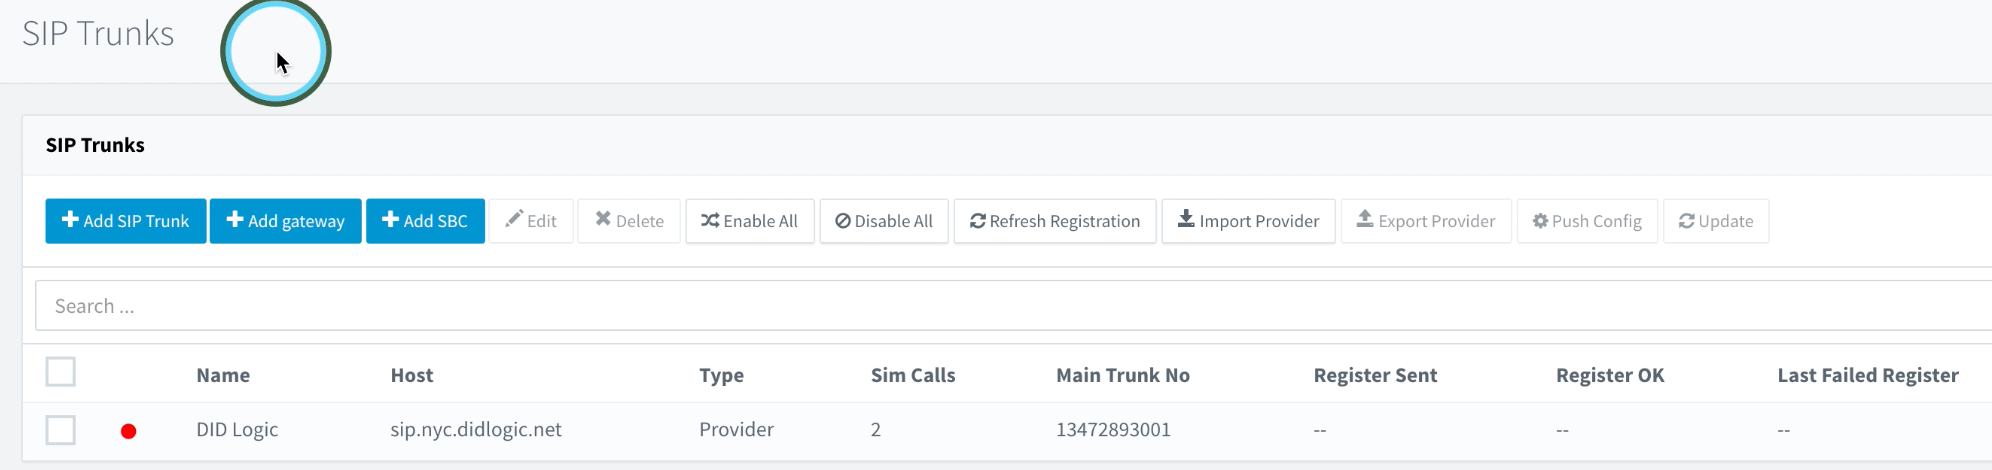
At this time, we should return to the SIP Trunks section and confirm we have an active registration with the Regional DID Logic Proxy. If you see a green dot indicator next to the DID Logic SIP Trunk, we know that it was successfully able to register.

Testing the SIP Trunk
Assuming everything went according to plan, this setup should now be ready for testing. You can configure the 3CX soft phone to connect to the 3CX PBX and make and receive calls as the extension we configured. The 3CX Softphone can be downloaded at the following link:
https://www.3cx.com/phone-system/3cxphone/
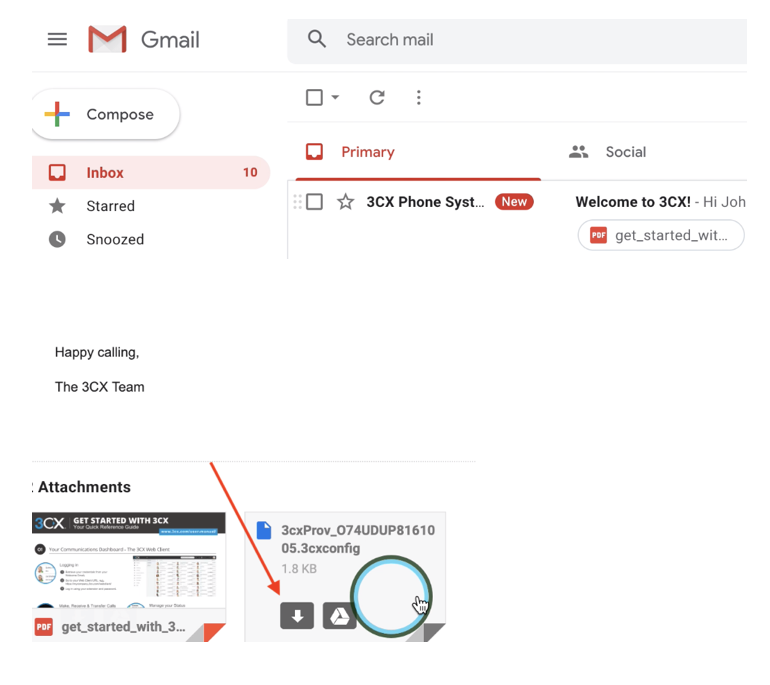
Once downloaded and installed, you can set up the 3CX Soft Phone by using the welcome email that was sent when we created the extension earlier on in the guide. For a newly created extension, a welcome email is sent to the email address that was filled out in the Extension’s Properties.
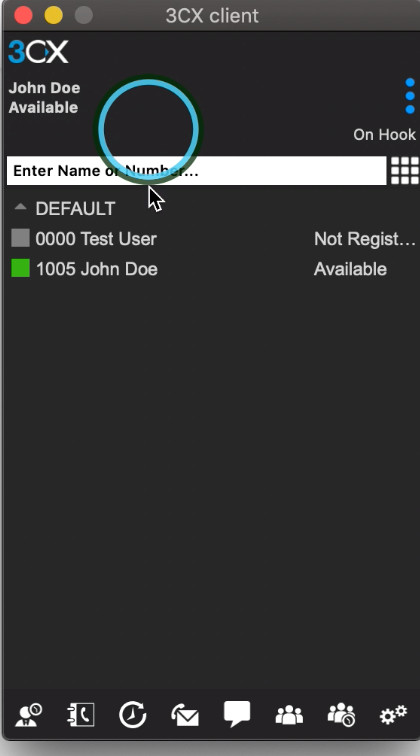
Log into your email and open the Welcome Email from your 3CX PBX Server. From the welcome email, you will be able to download the configuration file to set up the 3CX client, by opening the configuration file from the 3CX Softphone.
Once the 3CX Soft Phone is configured, go ahead and test making an inbound and outbound call to a separate device.
Should you have issues making outbound calls, be sure to check the following:
Dial the full international number: 1-212-555-1212 (US), 44-208-500-0000 (London). Dialing 212-555-1212 won’t work. Do not dial with a leading 0 or 00 or 011 in front. This is by far the most frequent reason for outgoing calls to fail.
If in doubt, stop all registrations, disable the trunk config, download Zoiper and attempt placing calls using Zoiper Soft Phone (see the following link for instructions on how to configure Zoiper Soft Phone https://didlogic.com/setup/setup-guides/softphonesapps/zoiper-setup-guide). This will tell you right away if the problem is somewhere in your local PBX configuration or not.
Free trial is available for IT infrastructure managers and developers.