


Connecting didlogic numbers to Vapi AI
This document provides technical instructions for integrating the Vapi AI platform with DIDLogic. The objective is to configure a SIP trunk to route incoming and outgoing calls between a DIDLogic phone number and a Vapi AI agent.
1. Purchase a number on the DID Logic platform
Before placing or receiving a call, you must have an active phone number associated with your DIDLogic account. If you already have one, you can skip this section.
To purchase a number:
- Log in to your DID Logic account
- Click BUY on the top menu
- Select the country and region where you wish to purchase a number
- Choose a specific number or numbers and click the Add to Cart button
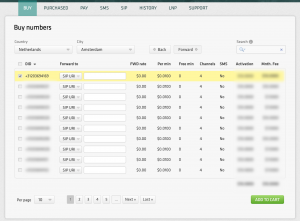
- The Cart page opens, confirming the selection and completion of the checkout process for the DID(s).

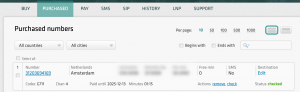
Once you have purchased the DID, it will be reflected in the PURCHASED tab.
Note:
Some numbers may require proof of local address and other documents before they can be activated. To activate these numbers, upload the requested documents and wait for approval from the DID Logic Provisioning team.
2. Create a SIP account
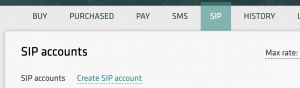
- Navigate to the SIP tab in the top menu
- Click the Create SIP account button
- Specify the SIP account name, set the SIP account password, and select one of the DIDs on your account as the Caller ID
- You can optionally restrict access by specifying authorised IP addresses, maximum call length, channels, and maximum call cost. If these parameters are not configured, the global account limits will apply
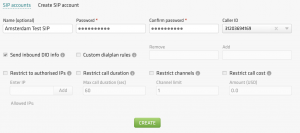
- Click Create.
After the SIP account is successfully created, it will appear on the list of SIP accounts

Please note that your 5-digit SIP account username is generated automatically and displayed in the SIP user name column.
3. Setting up Phone Number via SIP Trunking
- Go to the Phone Numbers section located on the left side of the screen
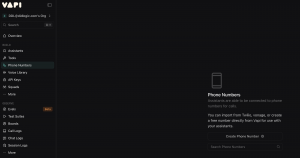
- Click on the “Create Phone Number” to open the configuration dialogue.
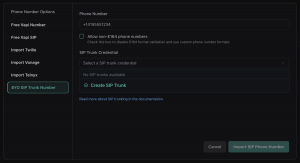
- Click “BYO SIP Trunk Number” and then select the “SIP Trunk Credential” field
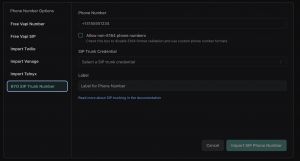
- In this field, select “Create SIP Trunk”
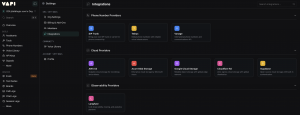
- You will be redirected to a new page with integrations
- Navigate down to the “Phone Number Providers” section and select “SIP trunk”
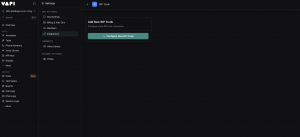
- Click on “Configure New SIP Trunk”
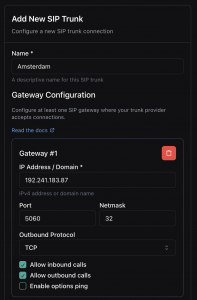
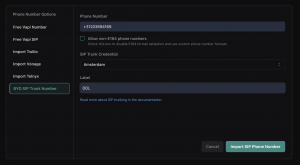
- Enter basic configuration with the following information:
Name: Label for the trunk
IP Address / Domain: Address that will be used for outgoing calls. Since Vapi SIP signalling servers are located in the US, we recommend using addresses for sip.nyc.didlogic.net [192.241.183.87] and sip.lax.didlogic.net [185.118.62.77] which can be found HERE
Outbound Protocol: Select it to TCP/UDP/TLS
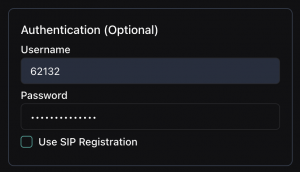
- Below the gateway configuration, navigate to the “Authentication (Optional)” window and enter the following info:
Username: Username for SIP authentication (by default, your SIP login)
Password: Password for SIP authentication
- Click “Save SIP Trunk” to finalise the configuration. And return back to the “Phone Numbers” section
- Now you will be able to select the created SIP trunk
- Enter the phone number and label, then press “Import SIP Phone Number”
4. Creating and Configuring the AI Agent
Once your phone number has been successfully imported, the next step is to create and configure the AI agent that will handle the calls.
To ensure access to the most up-to-date and detailed information, we recommend using their official guide, available in their official documentation.
Once you have created the agent, assign it to the phone number by navigating to “Phone Numbers” and selecting your agent for both inbound and/or outbound calls. After you have assigned the agent, press “Save”
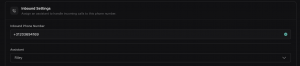
5. Incoming calls
In order for your agent to receive calls to your number, you need to go to DIDLogic and configure the SIP URI.
Steps to configure incoming call routing to a valid SIP URI:
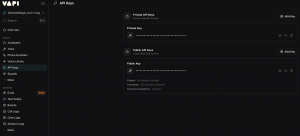
- Locate “API keys” on the sidebar and copy “Private Key”
- Navigate to your numbers on the DIDLogic website and locate which one will be used by Vapi
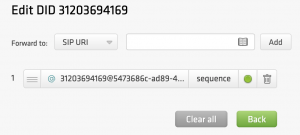
- Click “Edit” and on the menu “Forward to:” choose “SIP URI”.
- Enter your number and private key separated by @, and at the end, add “.sip.vapi.ai”
- It should look like this: “[email protected]”
- Press the “Add “button, and it should appear just below. Make sure to place this destination first in order, if you already have another destination configured
6. Outgoing Calls
Once a phone number is configured and assigned to an AI agent, the agent can initiate outbound calls. There are several ways of this process:
- Singular phone call: In “Phone numbers”, click on your phone number and navigate to the “Outbound Calls” window
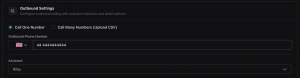
- Select the destination country and enter the number, then press “Make a Call”

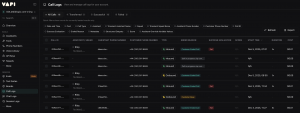
- You can monitor your entire call history in the “Call Logs” tab in the sidebar.
- Batch Call: Alternatively, you can initiate multiple outbound calls at once, making it ideal for campaigns or notifications. To access this feature, navigate to the “Outbound Calls” window and select “Call Many Numbers (Upload CSV)”
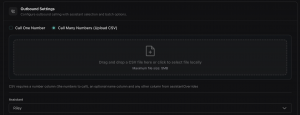
- Upload the CSV file of recipients and press “Make a Call”

- API Integration:
Detailed implementation guides, code examples, and specifications for API are available in the official documentation.
Free trial is available for IT infrastructure managers and developers.