


LiveAgent Basic setup guide
About LiveAgent
LiveAgent is help desk software that’s especially popular with e-commerce businesses at the small and midsize level. In addition to their core live chat application, the vendor also offers ticket management, online self-service portals and call center. In this setup guide below, we’ll explain how to add DID Logic VoIP phone number to LiveAgent so you’ll be able to receive and answer calls within LiveAgent.
LiveAgent provides:
— Inbound and Outbound calling
— Customized greetings and IVR
— Unlimited voice recording storage
— PC-to-PC Calls
— Internal calls
— Answering calls with any hardware phone device
— All browsers supported, softphone, mobile apps
Setup
1. Log on to the control panel at DID Logic.
Make sure you have enough funds in the account.
2. Go to SIP section of your account and click “Create SIP account”.
Fill in the Device Name (optional) and Password fields, then click “Update”:
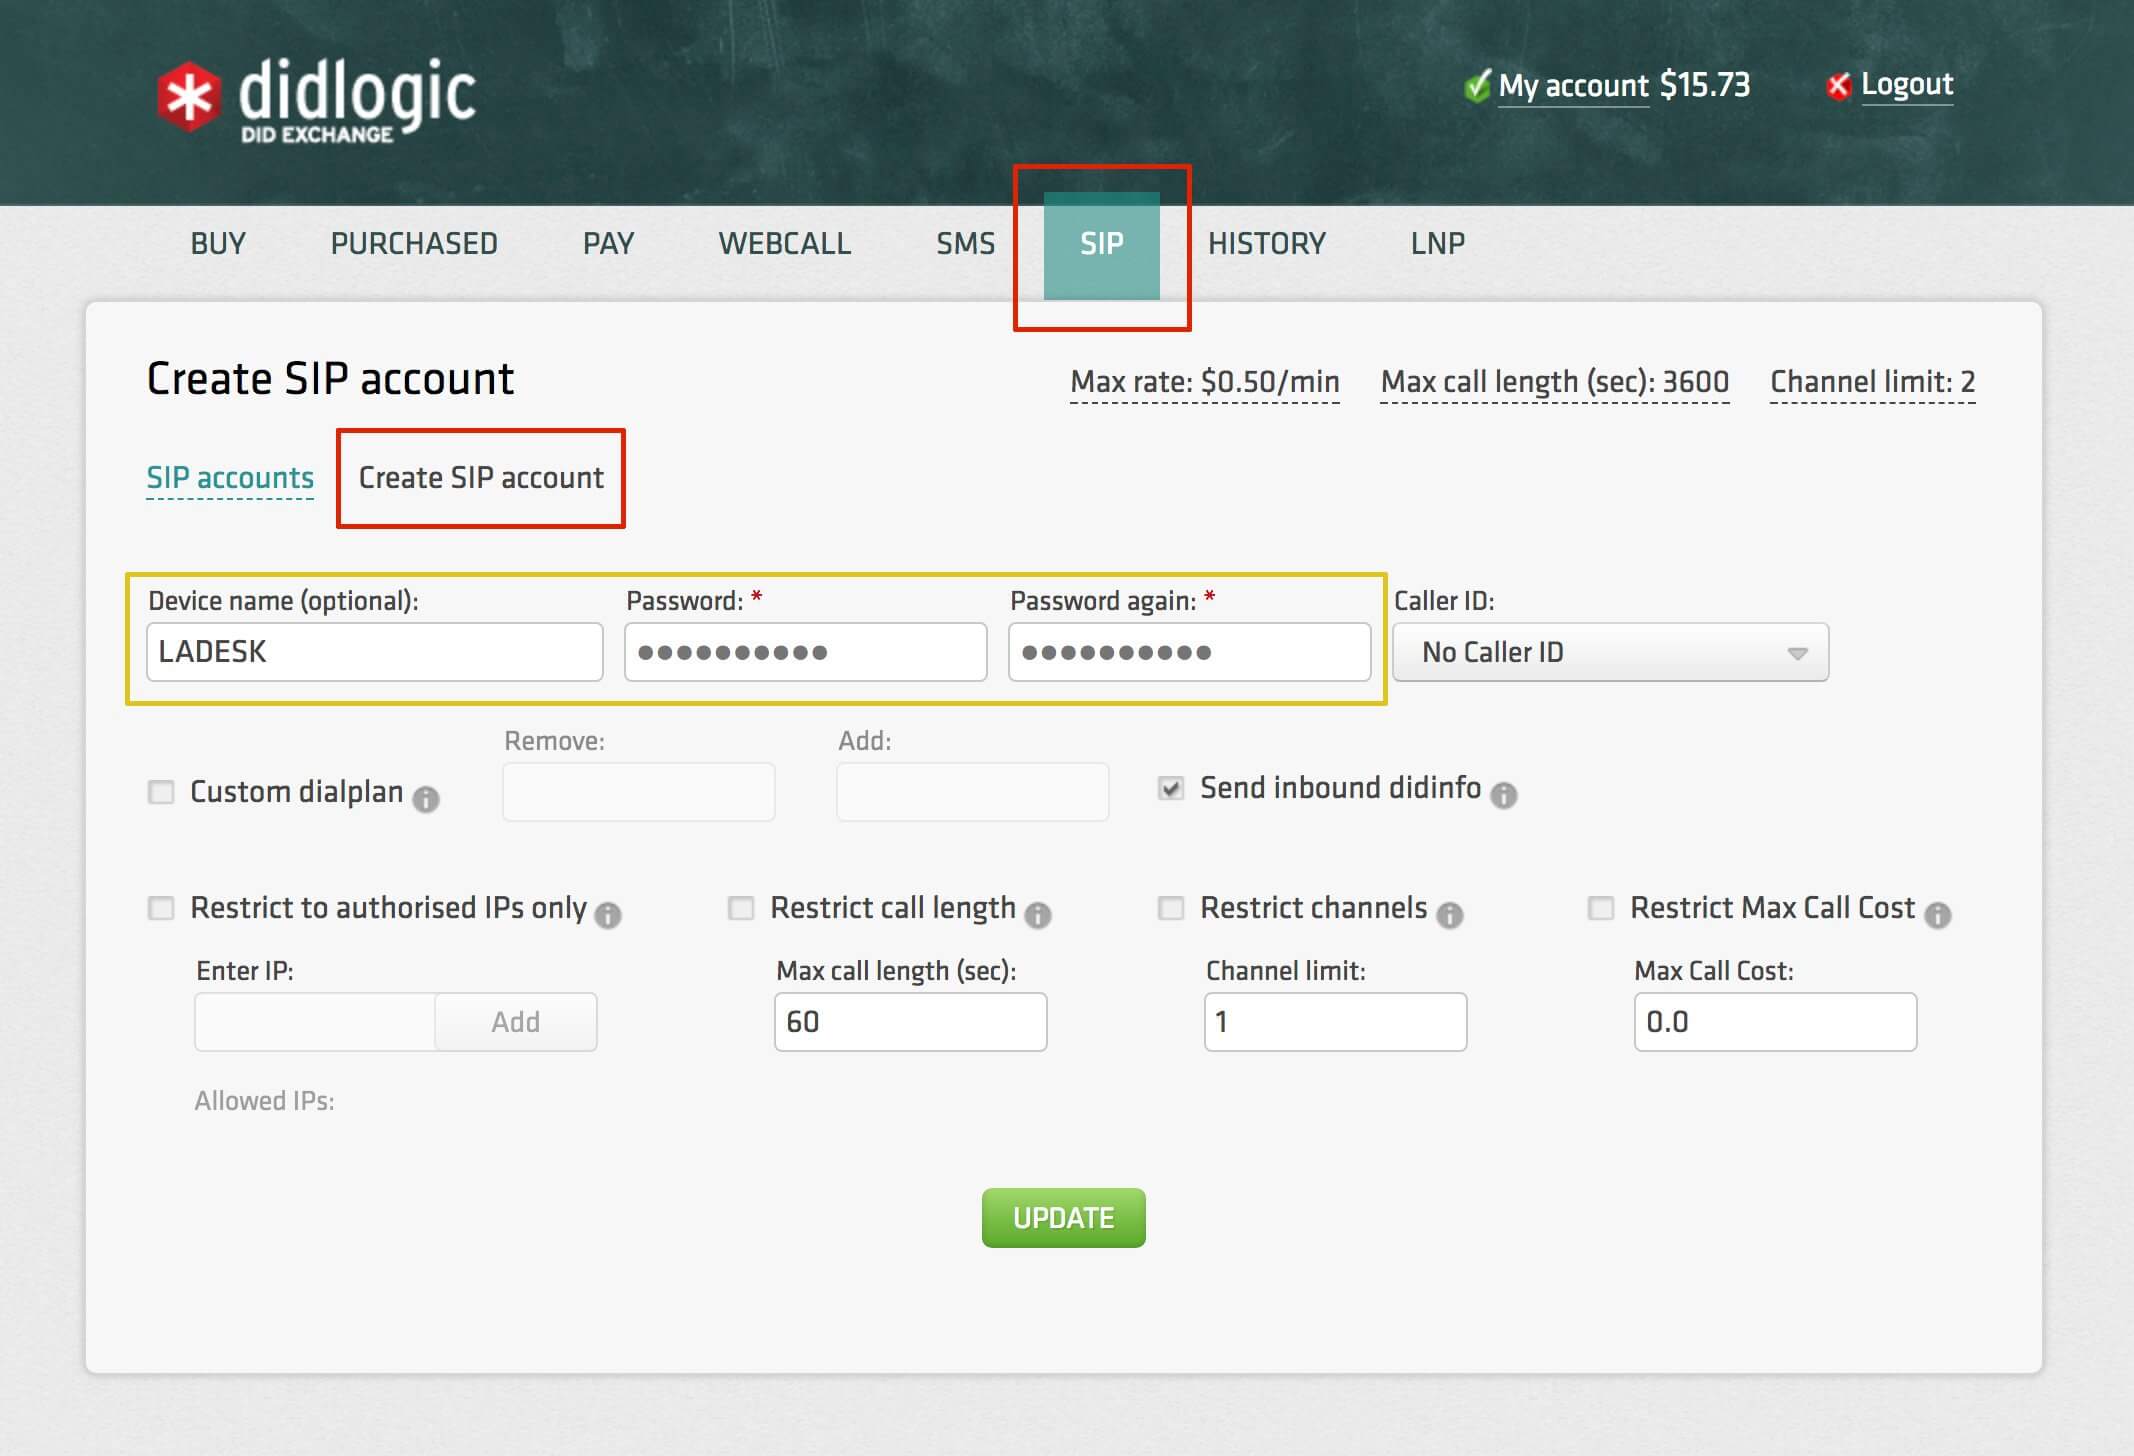
Your new 5-digit SIP username will be generated automatically:
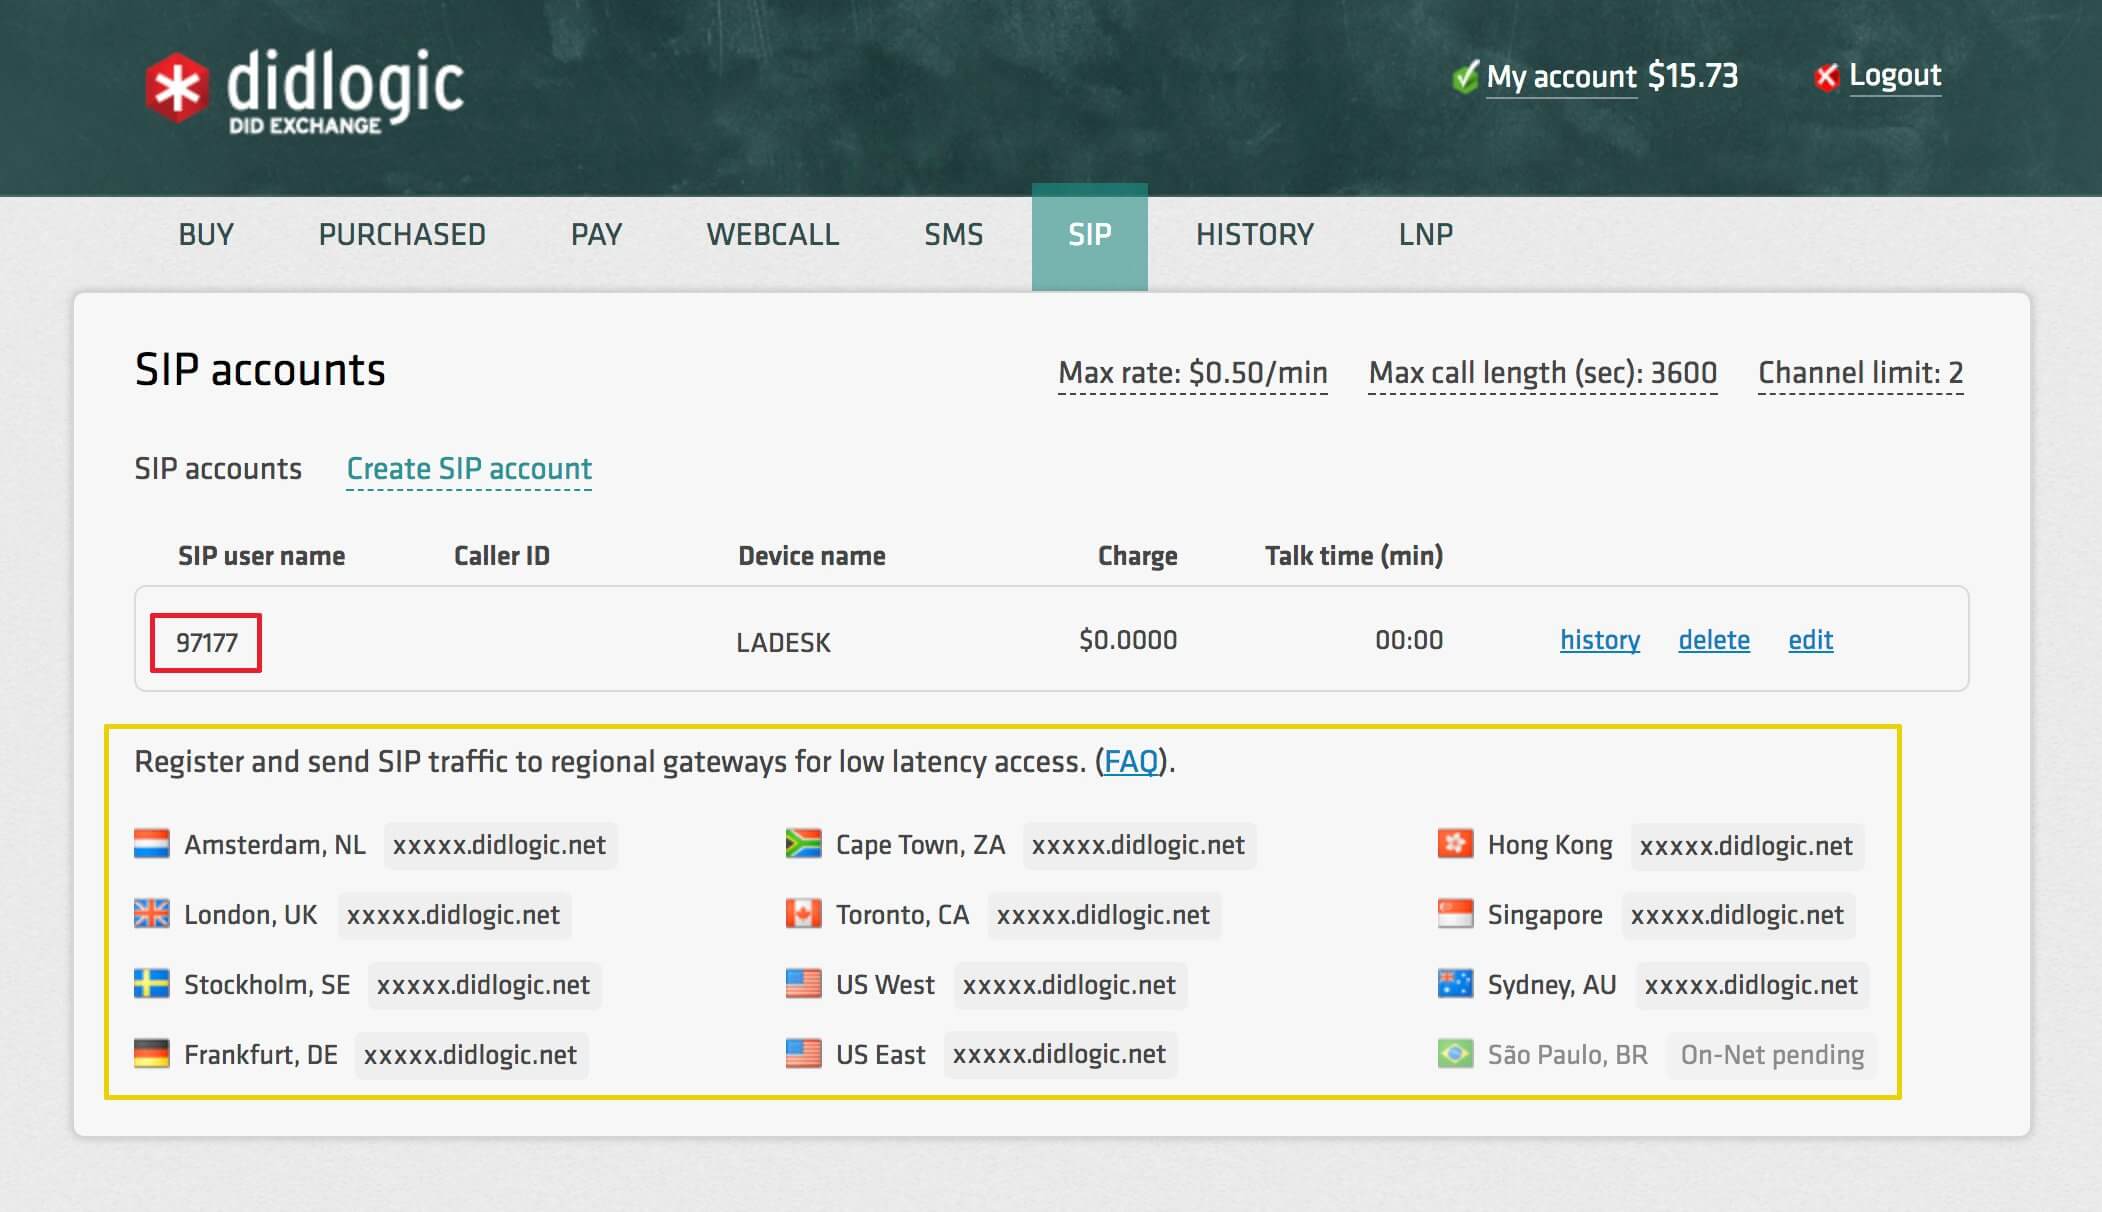
At the bottom of your “SIP” tab you can find the list of our local gateways. Please pick the closest geo gateway and use as “termination SIP URI” along with username/password pair of credentials to register your PBX.
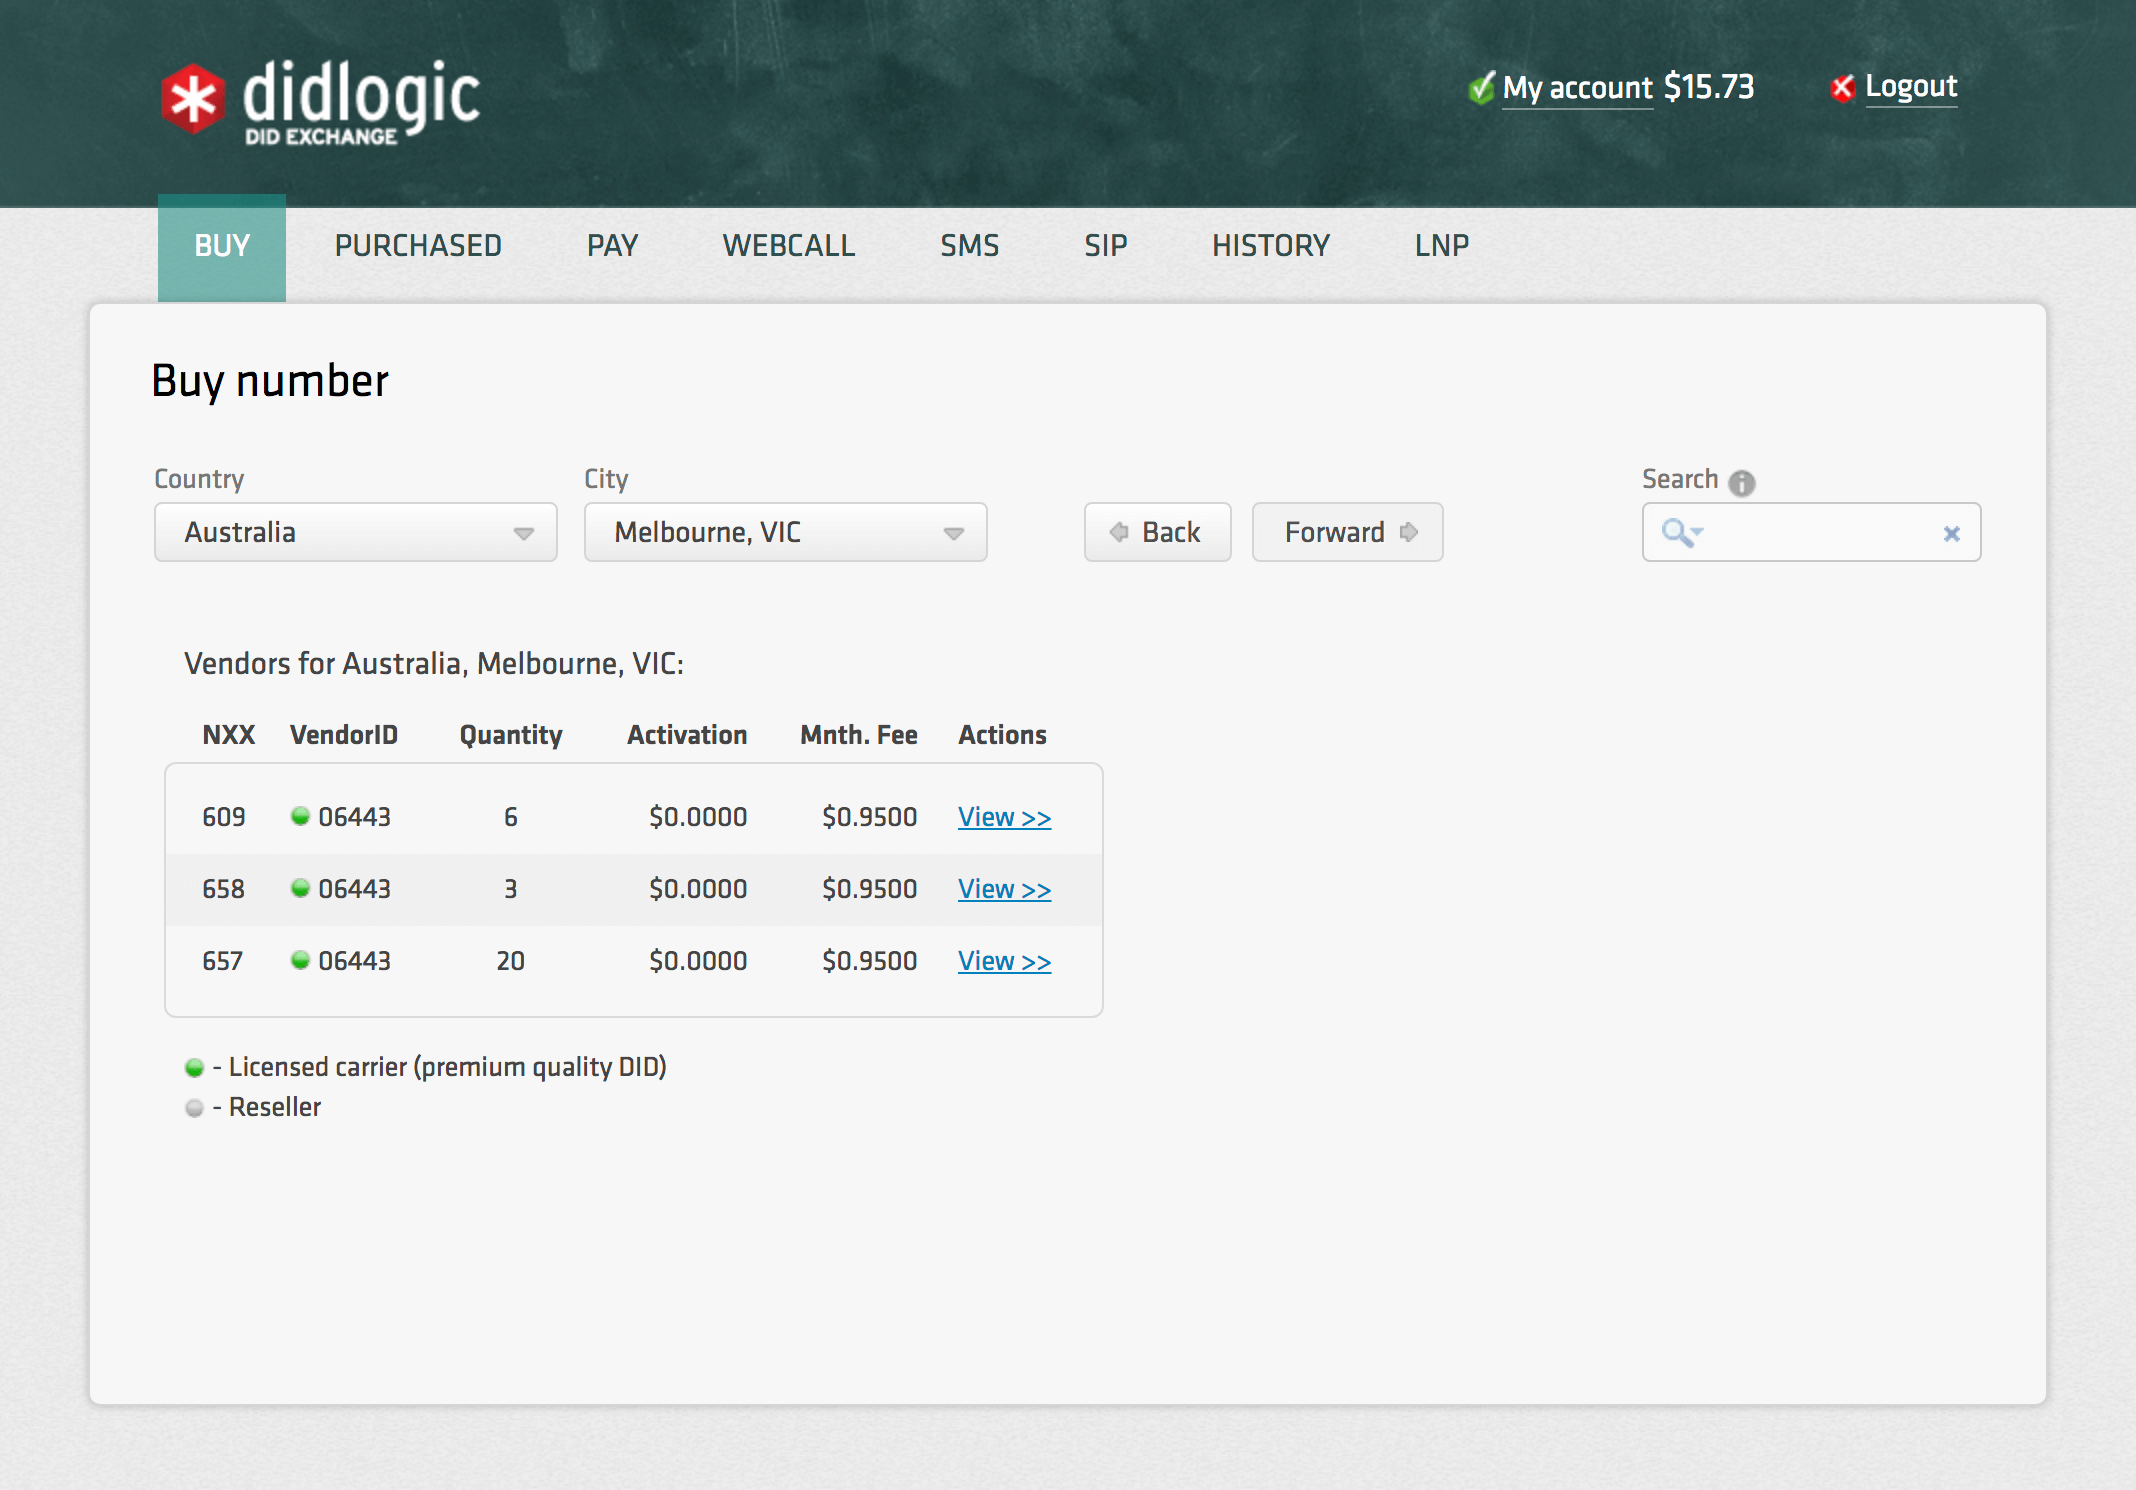
3. To buy DID number(s), please go to “BUY” section of your account:
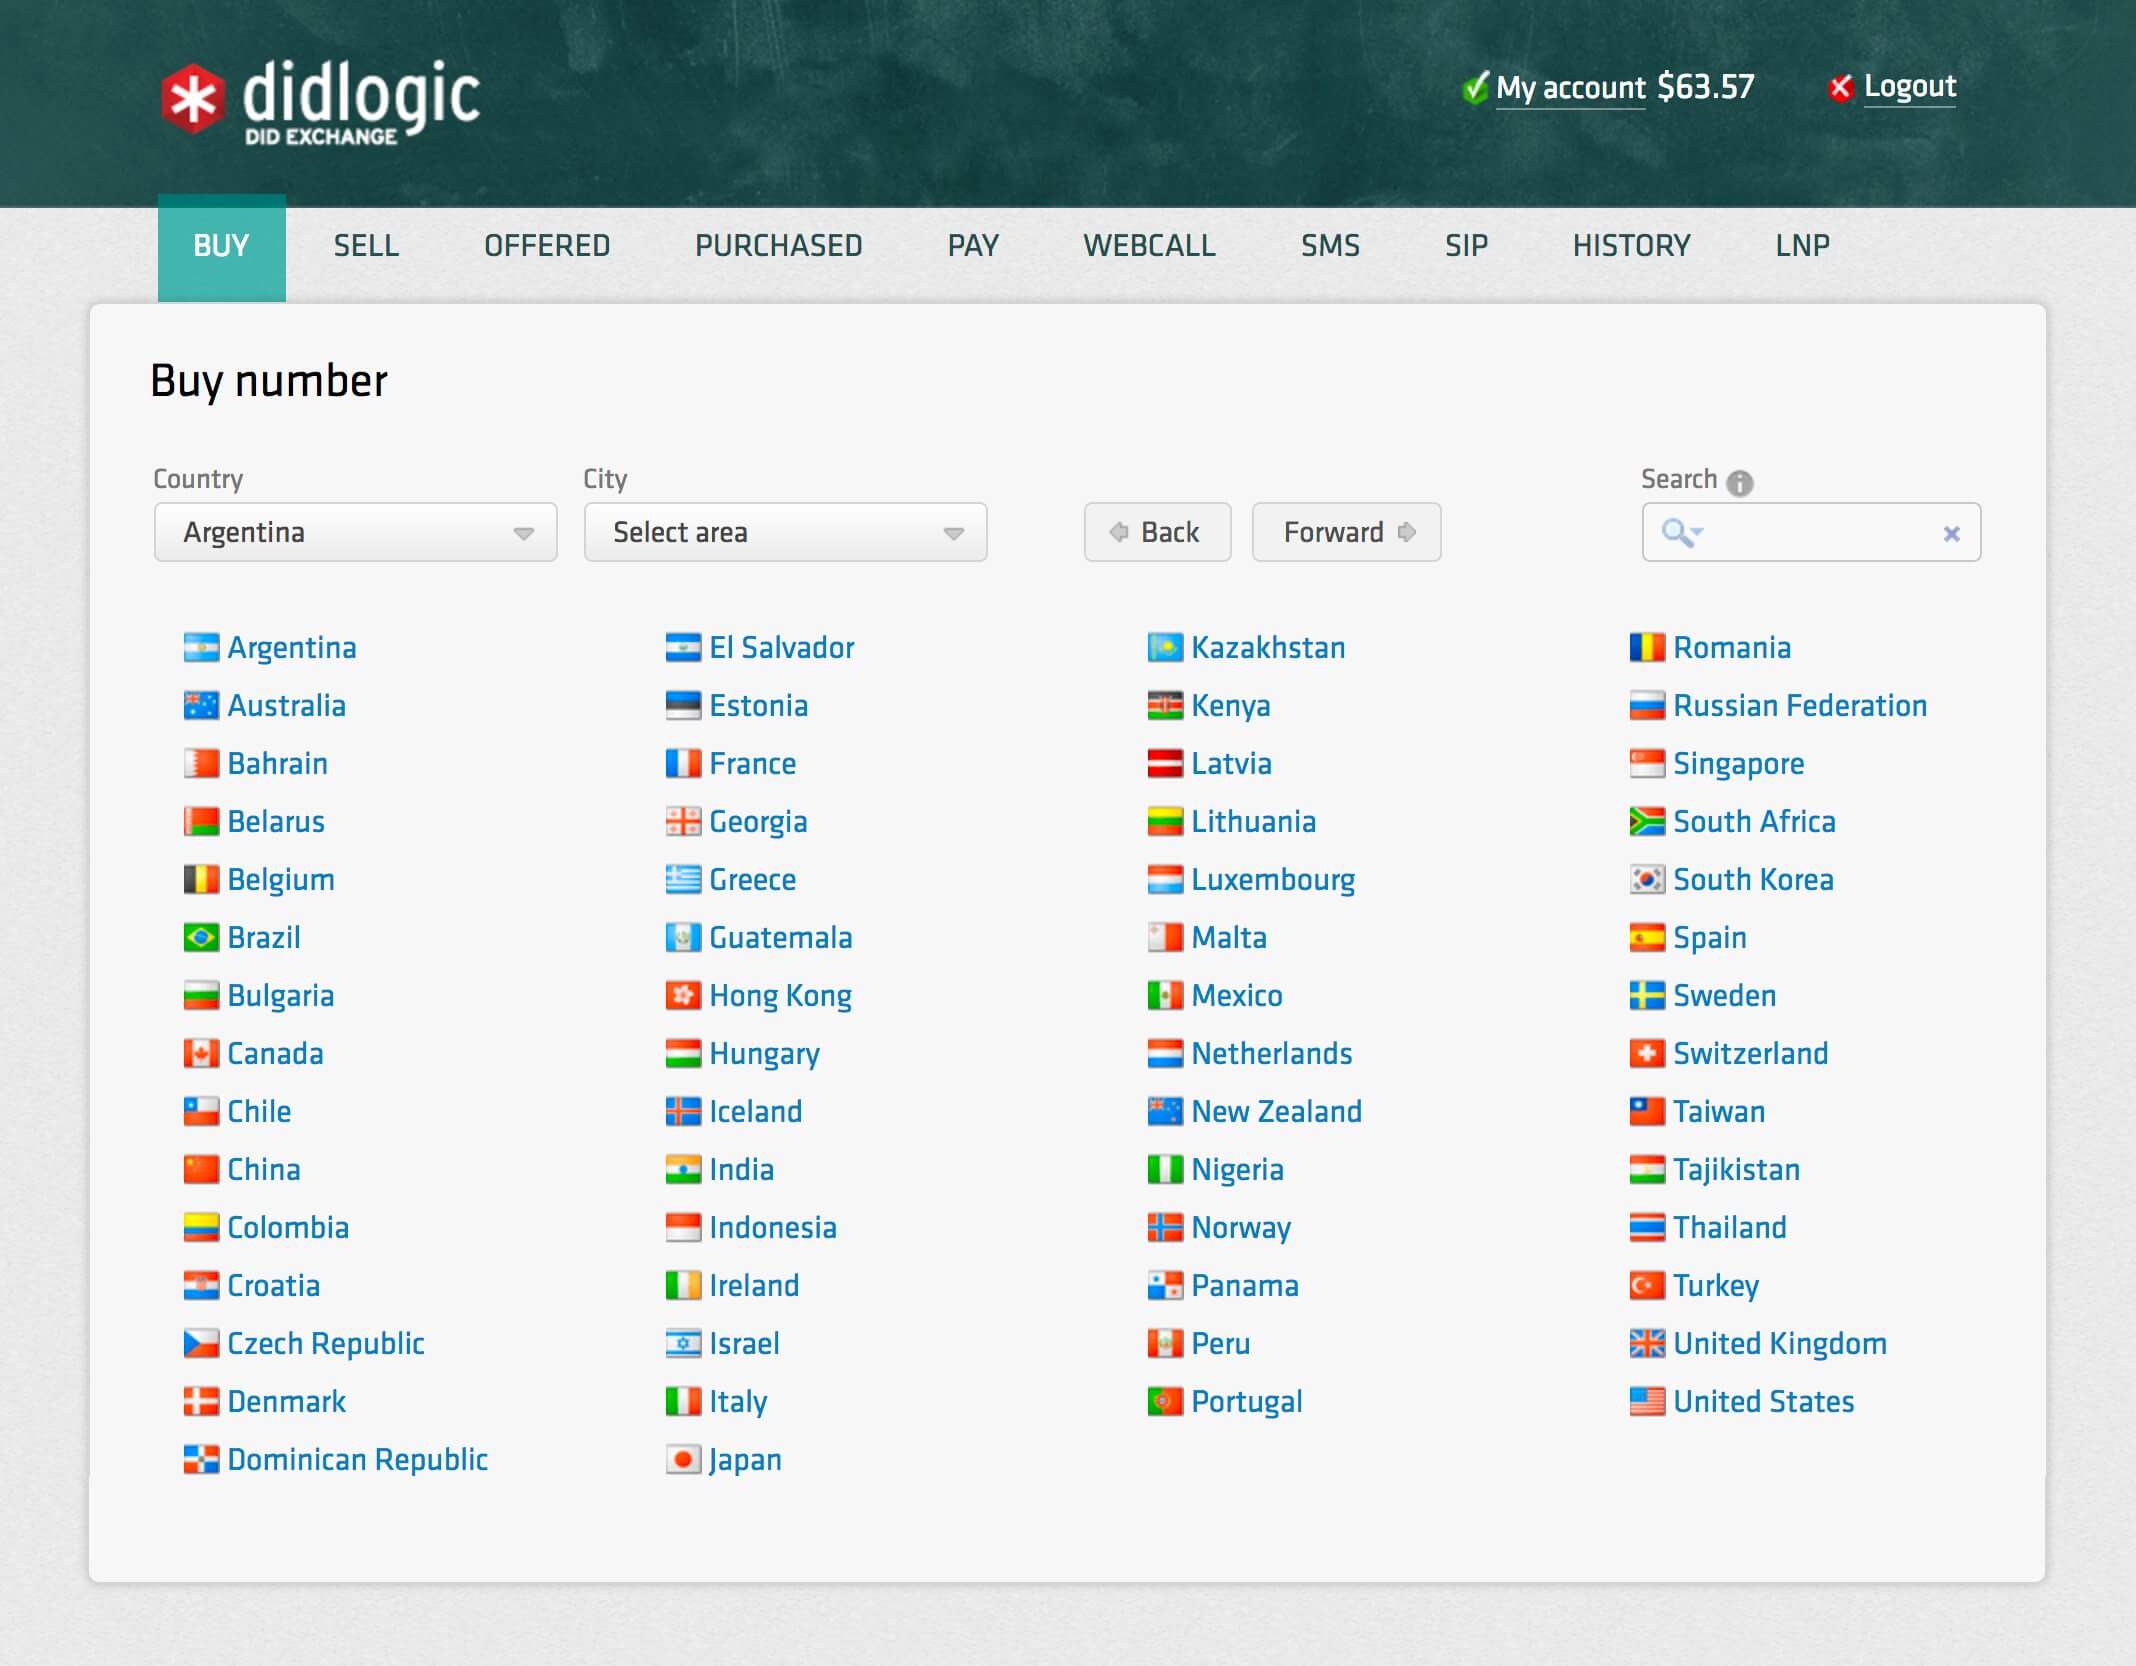
Choose country/city:
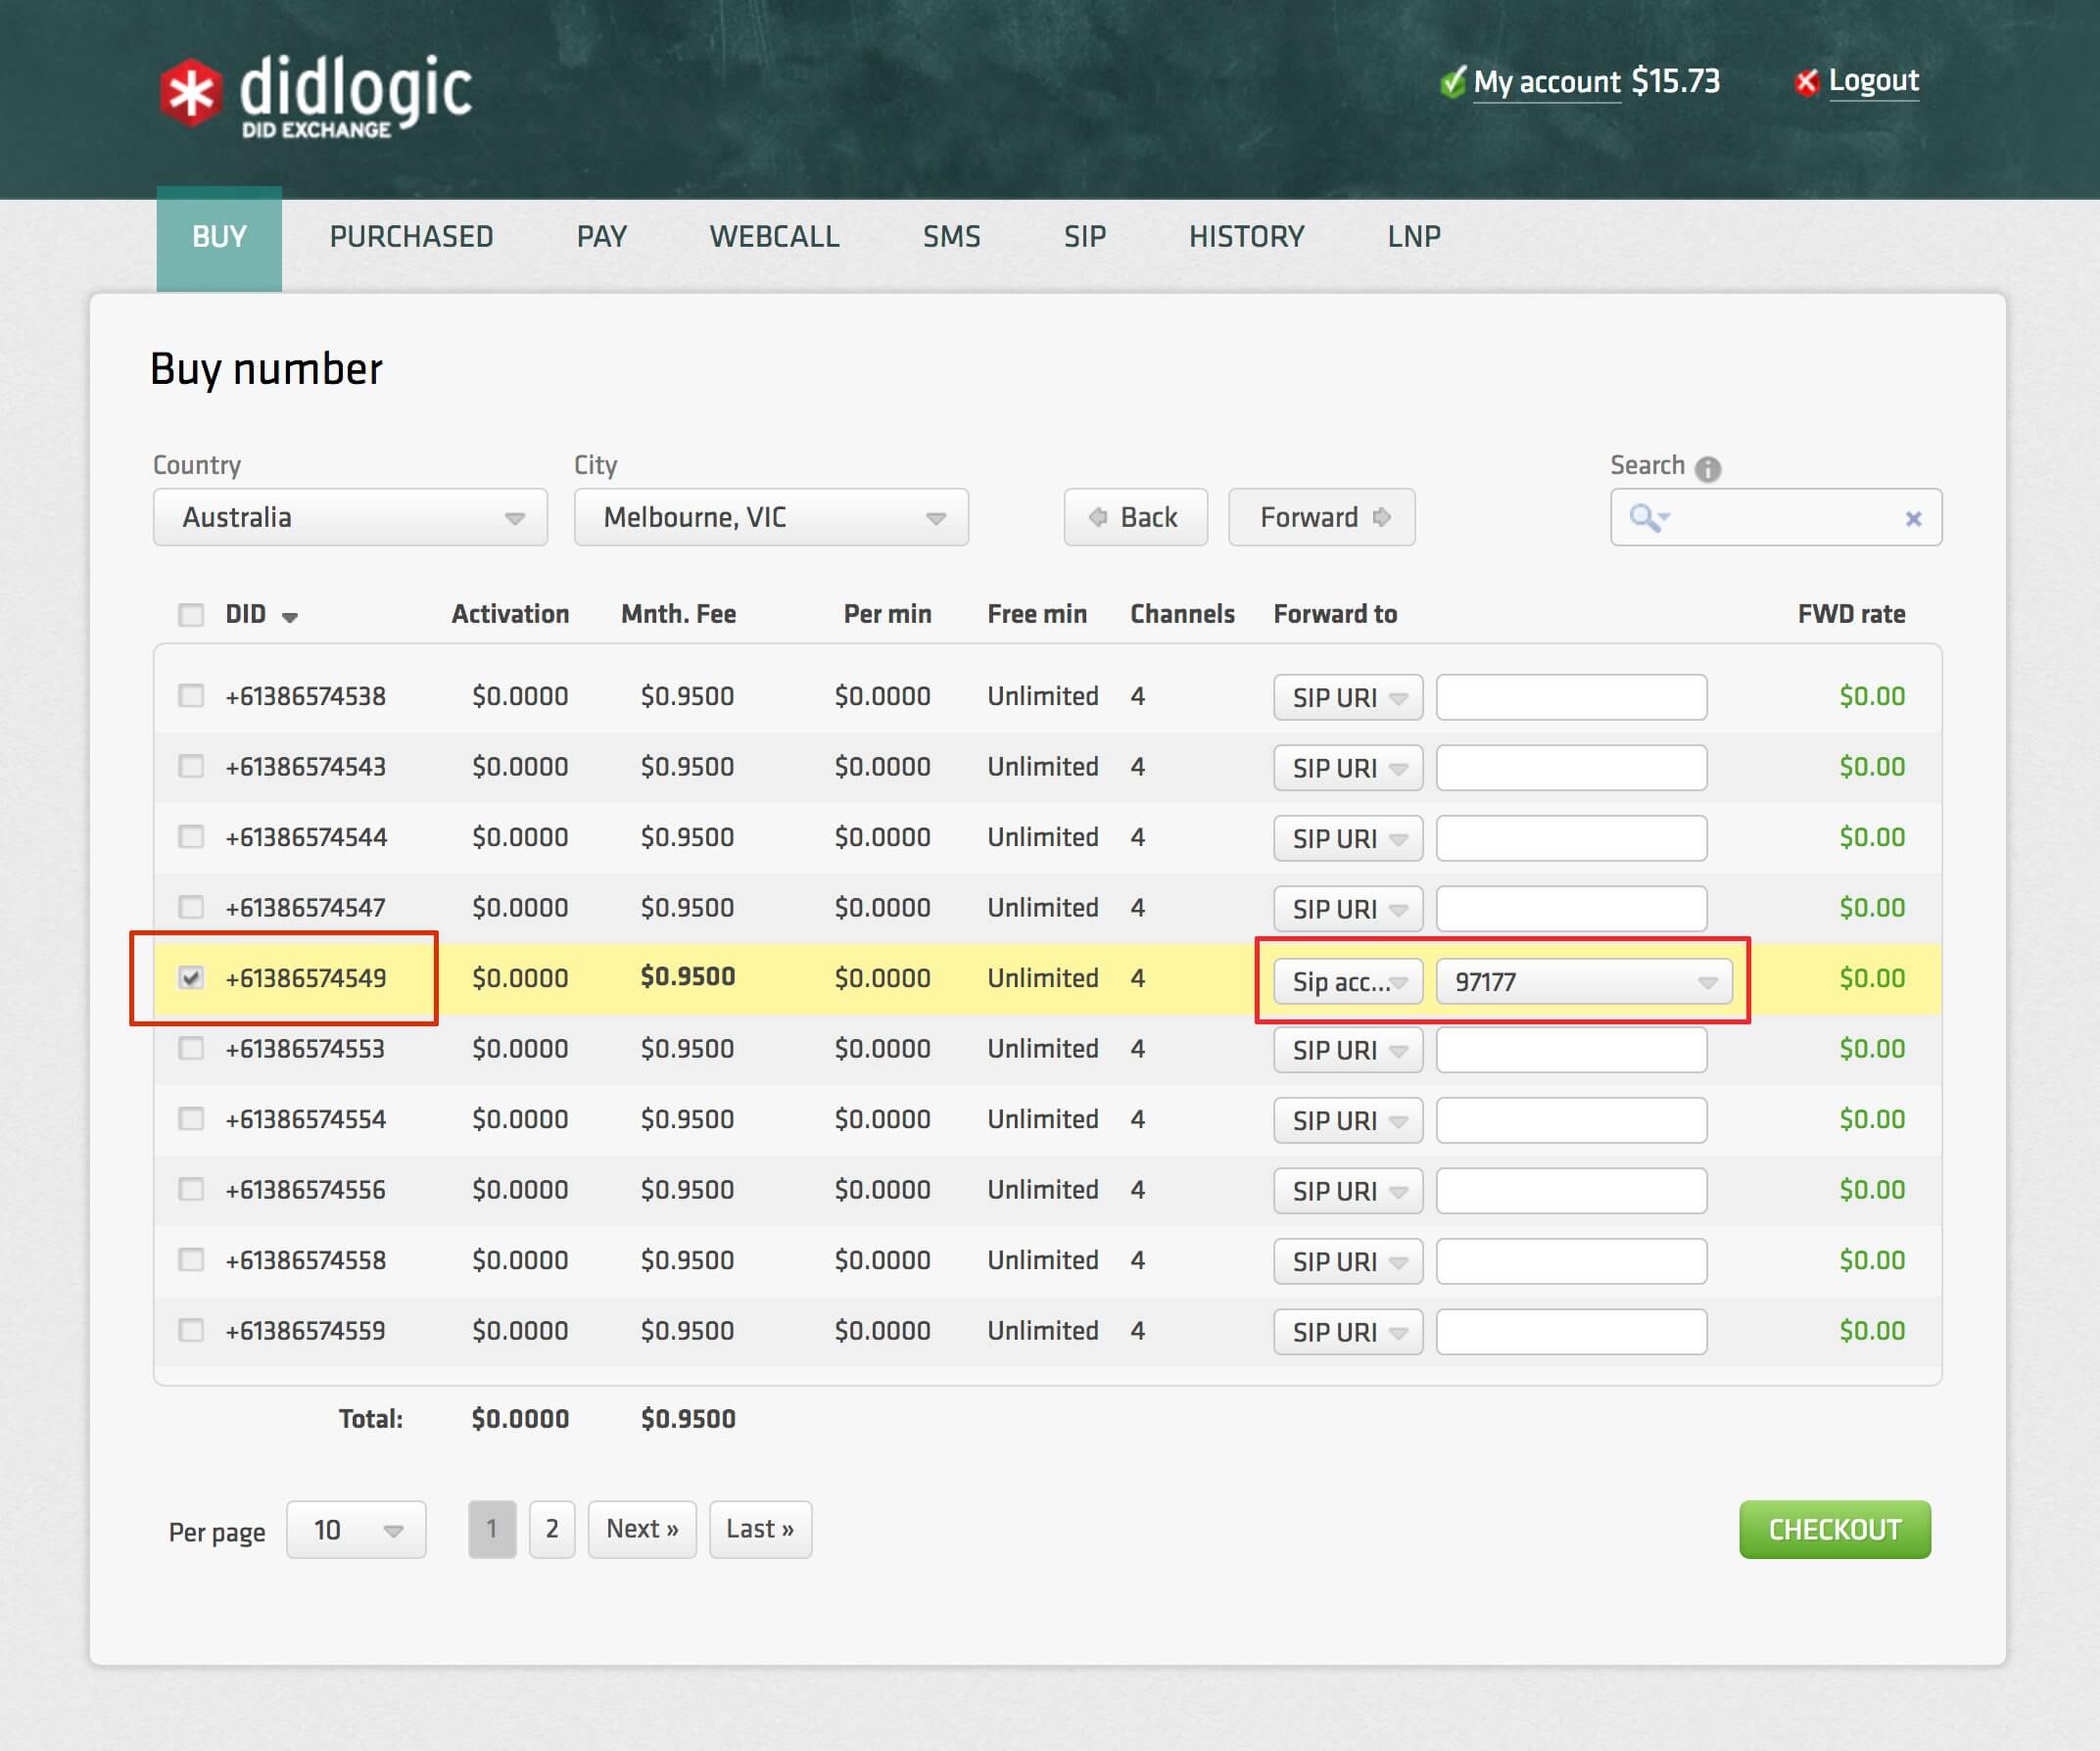
Choose the DID number, select “SIP account” from the drop-down menu under the “Forward to” field, and specify the sip account your DID number will be routed to:
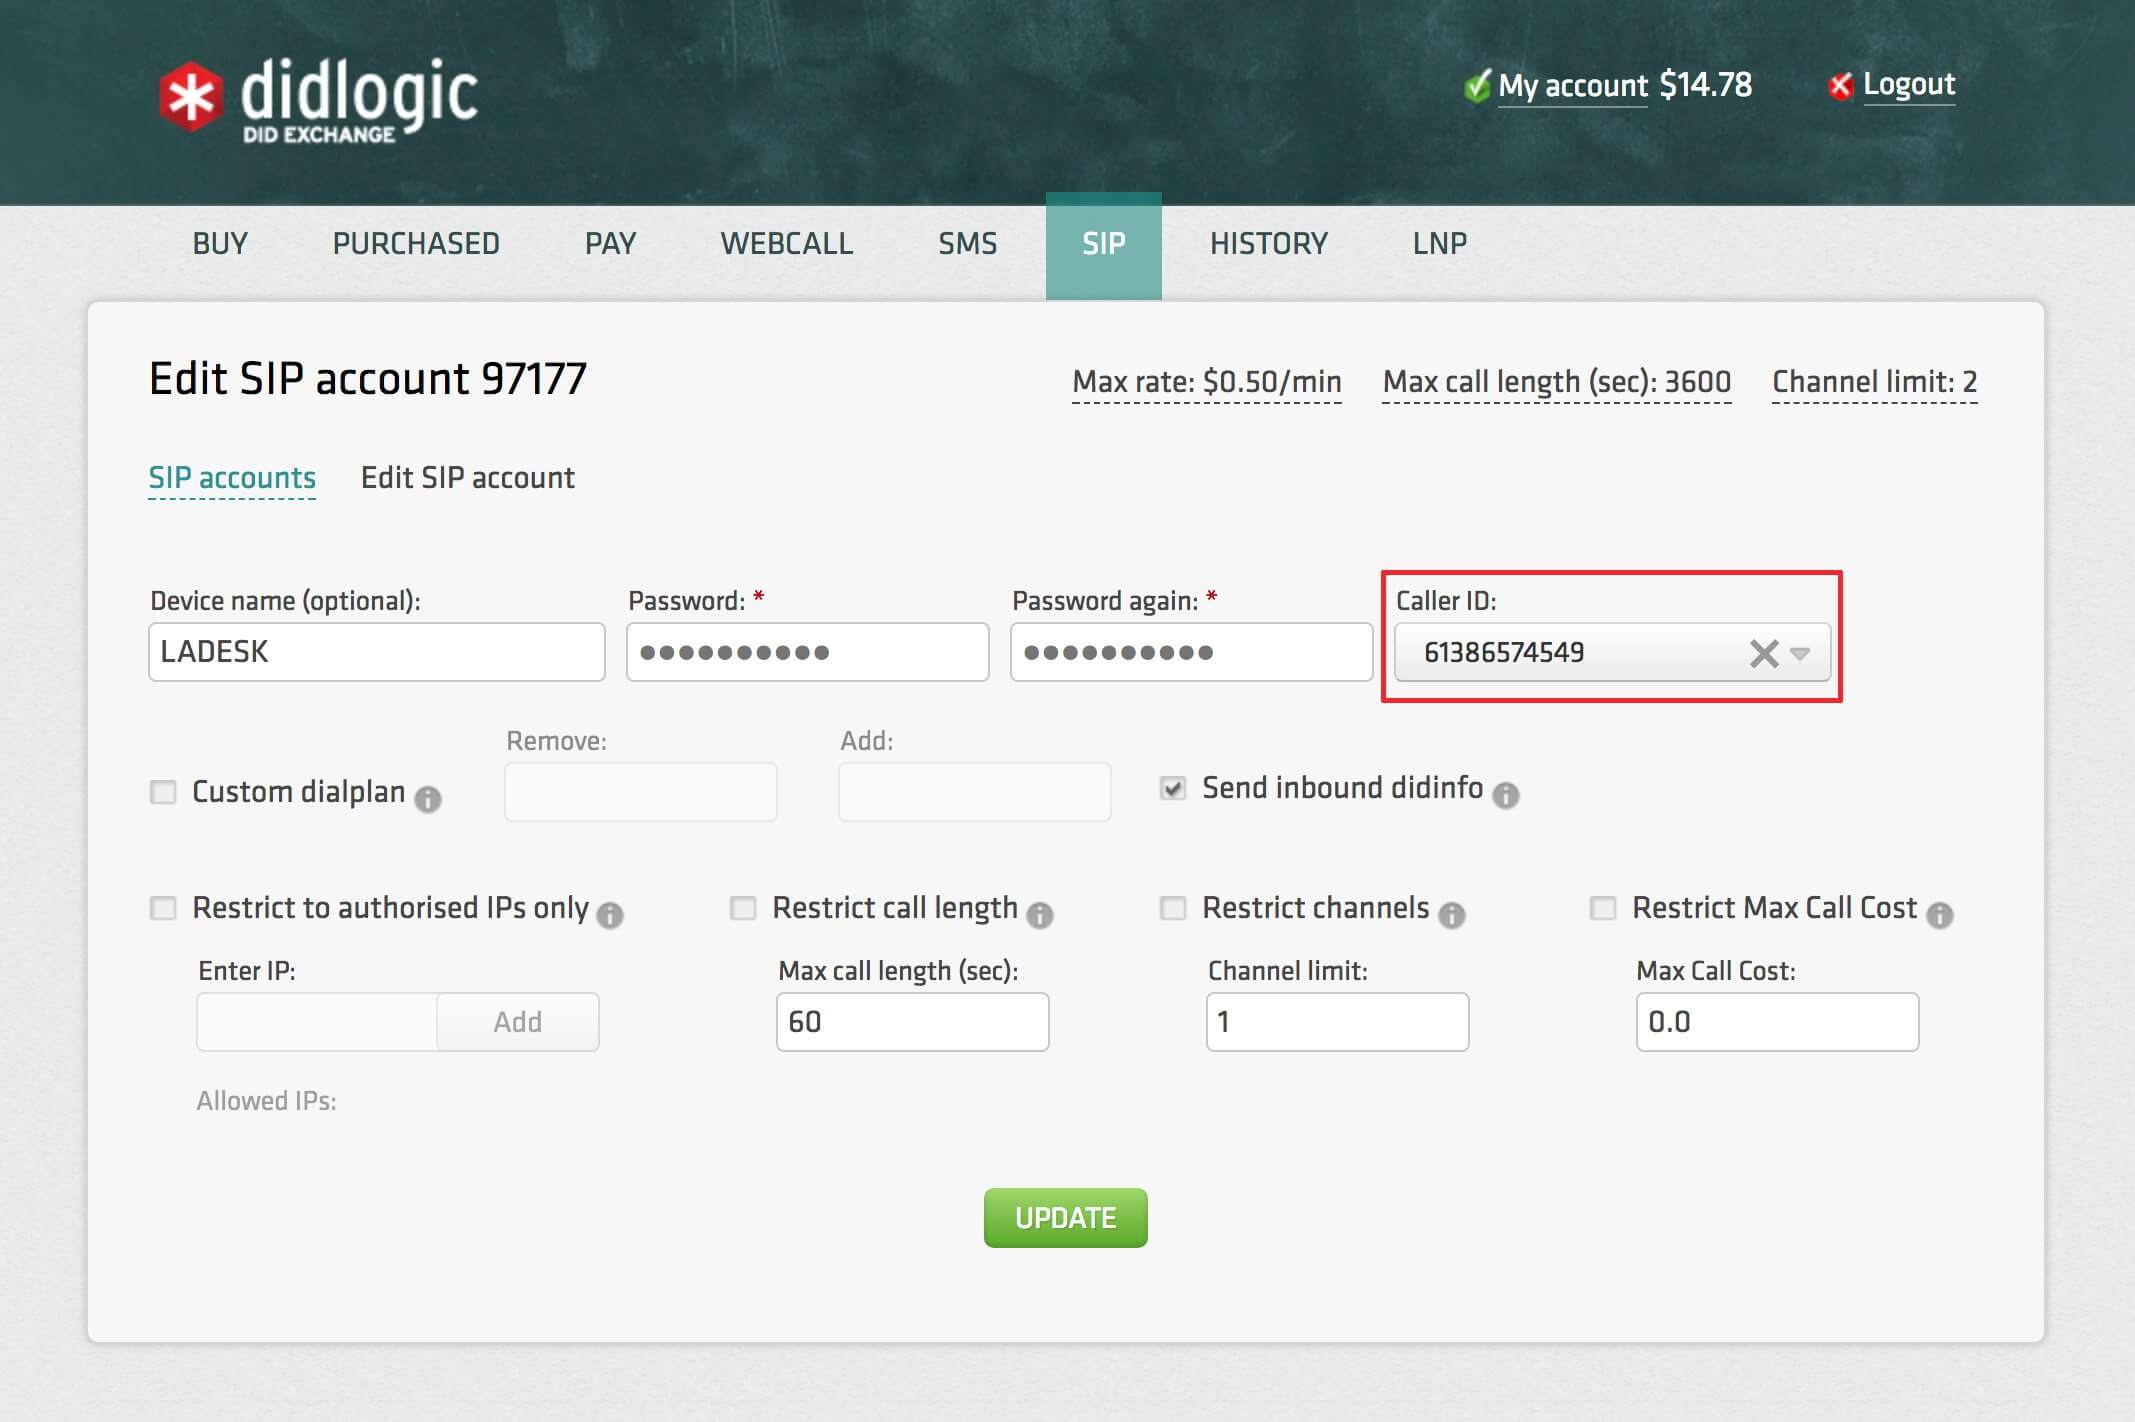
4. Then jump again to “SIP” tab, click edit and select Caller ID from the drop-down menu followed by clicking the UPDATE button:
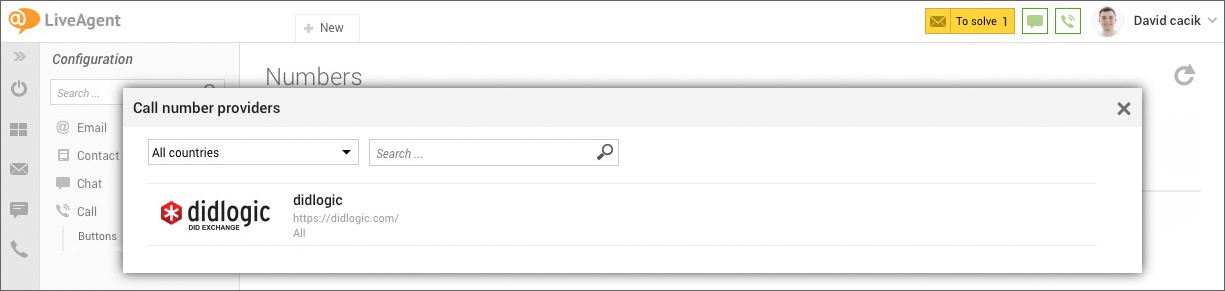
5. In your LiveAgent account navigate to the Configuration-> Call-> Numbers.
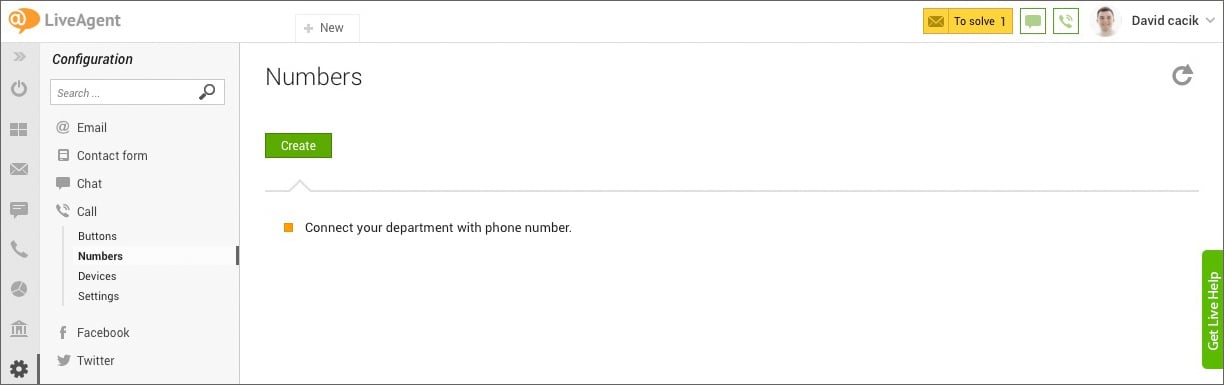
Click on the Create button and select DID Logic from the list of VoIP operators.
Copy and paste your SIP trunk details from your DID Logic account here:
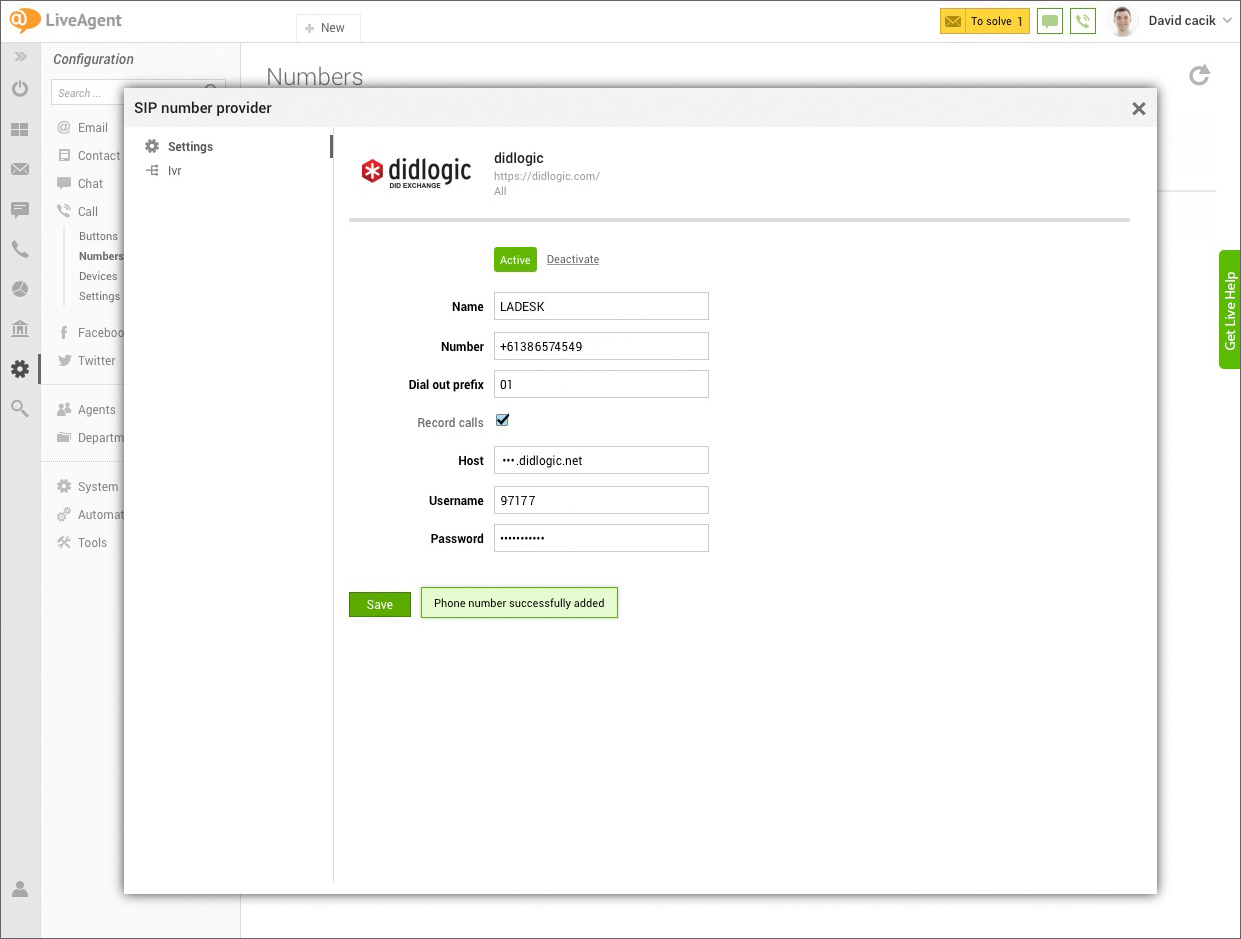
As the final step click on the Add button.
All done! You can now make and receive calls using the DID Logic SIP trunk in LiveAgent.
Free trial is available for IT infrastructure managers and developers.